Don’t buy a new one – just fix it up!
Electronics’ thermal design is essential. Electronic parts get hot, and the resistance of materials results in heat. Nothing in modern mass-produced products gets much hotter than the CPU in a PC. It’s simply the sheer size of the circuits on the die, billions of transistors switching at insane frequencies, fighting against the resistivity of their locality, all made worse by parasitic capacitance. Energy wasted—energy transformed into heat!
My trusty big lump of a laptop started spending a lot of time with the cooling fan on at full speed, and it was getting quite hot even during moderate CPU load. I eventually got fed up with getting cooked and bit the bullet and ordered some CPU thermal paste and a fresh can of air duster.
My plan was to strip it down and remove all the dust, dog hair, and biscuit crumbs clogging up the innards. I’d read that CPU thermal compound can dry out and reduce efficiency over time, so I would strip it right down to the CPU, making everything shiny, and start again. Since this laptop is three or so years old, and still acceptable with Windows 10, it was worth improving.
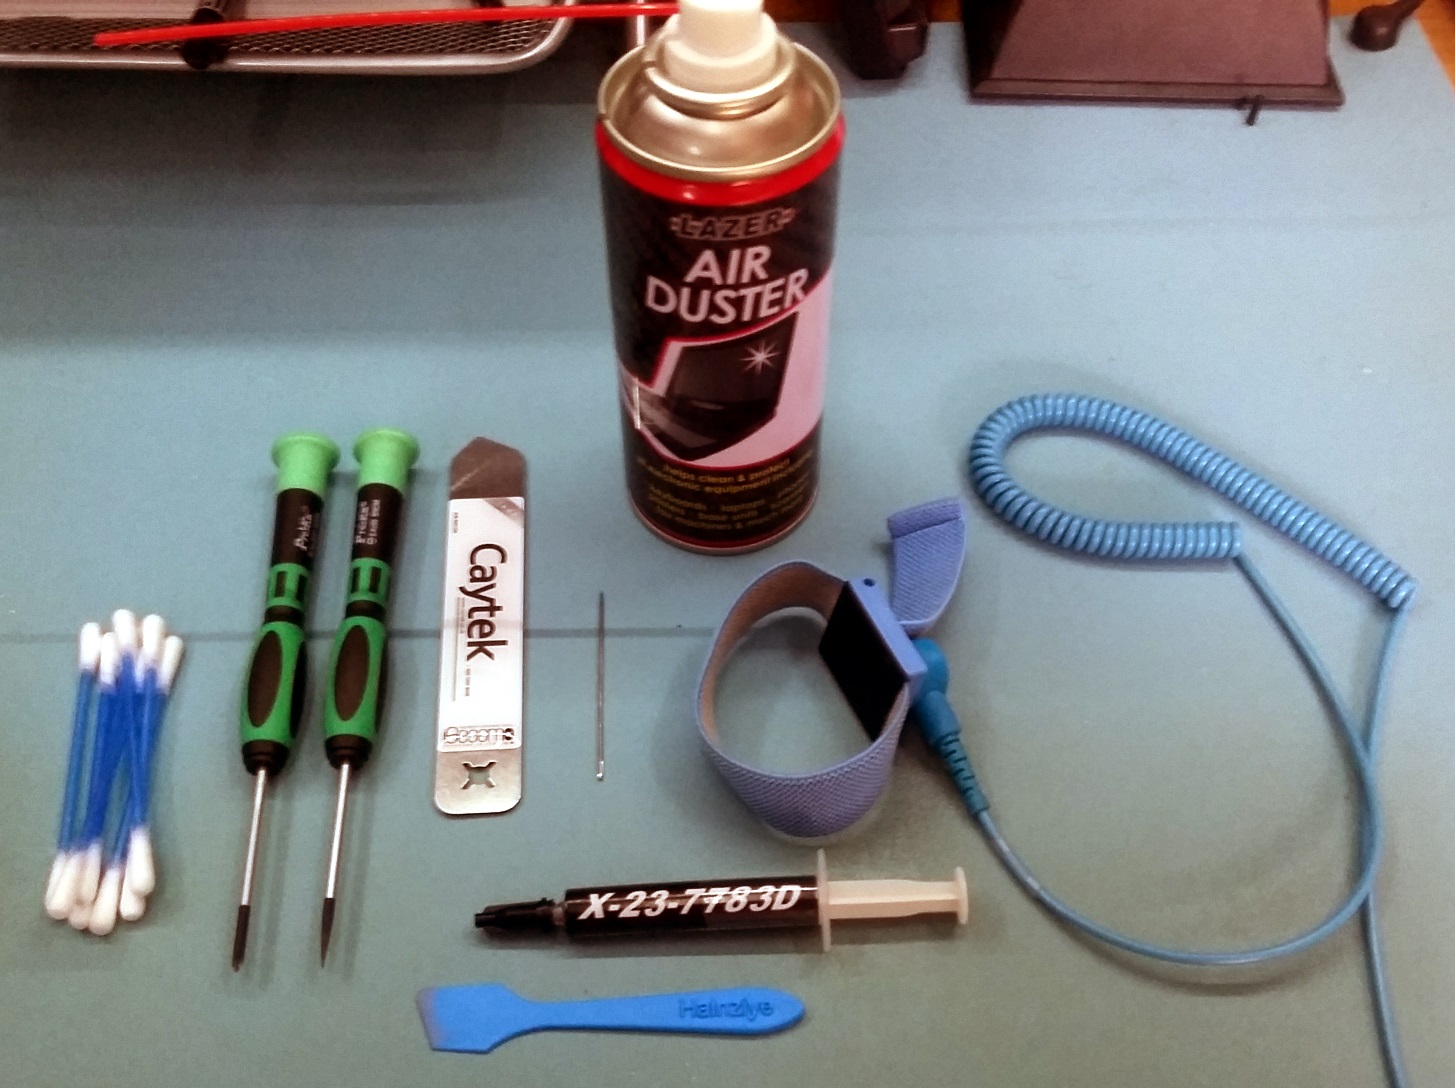
First step: Gather the tools
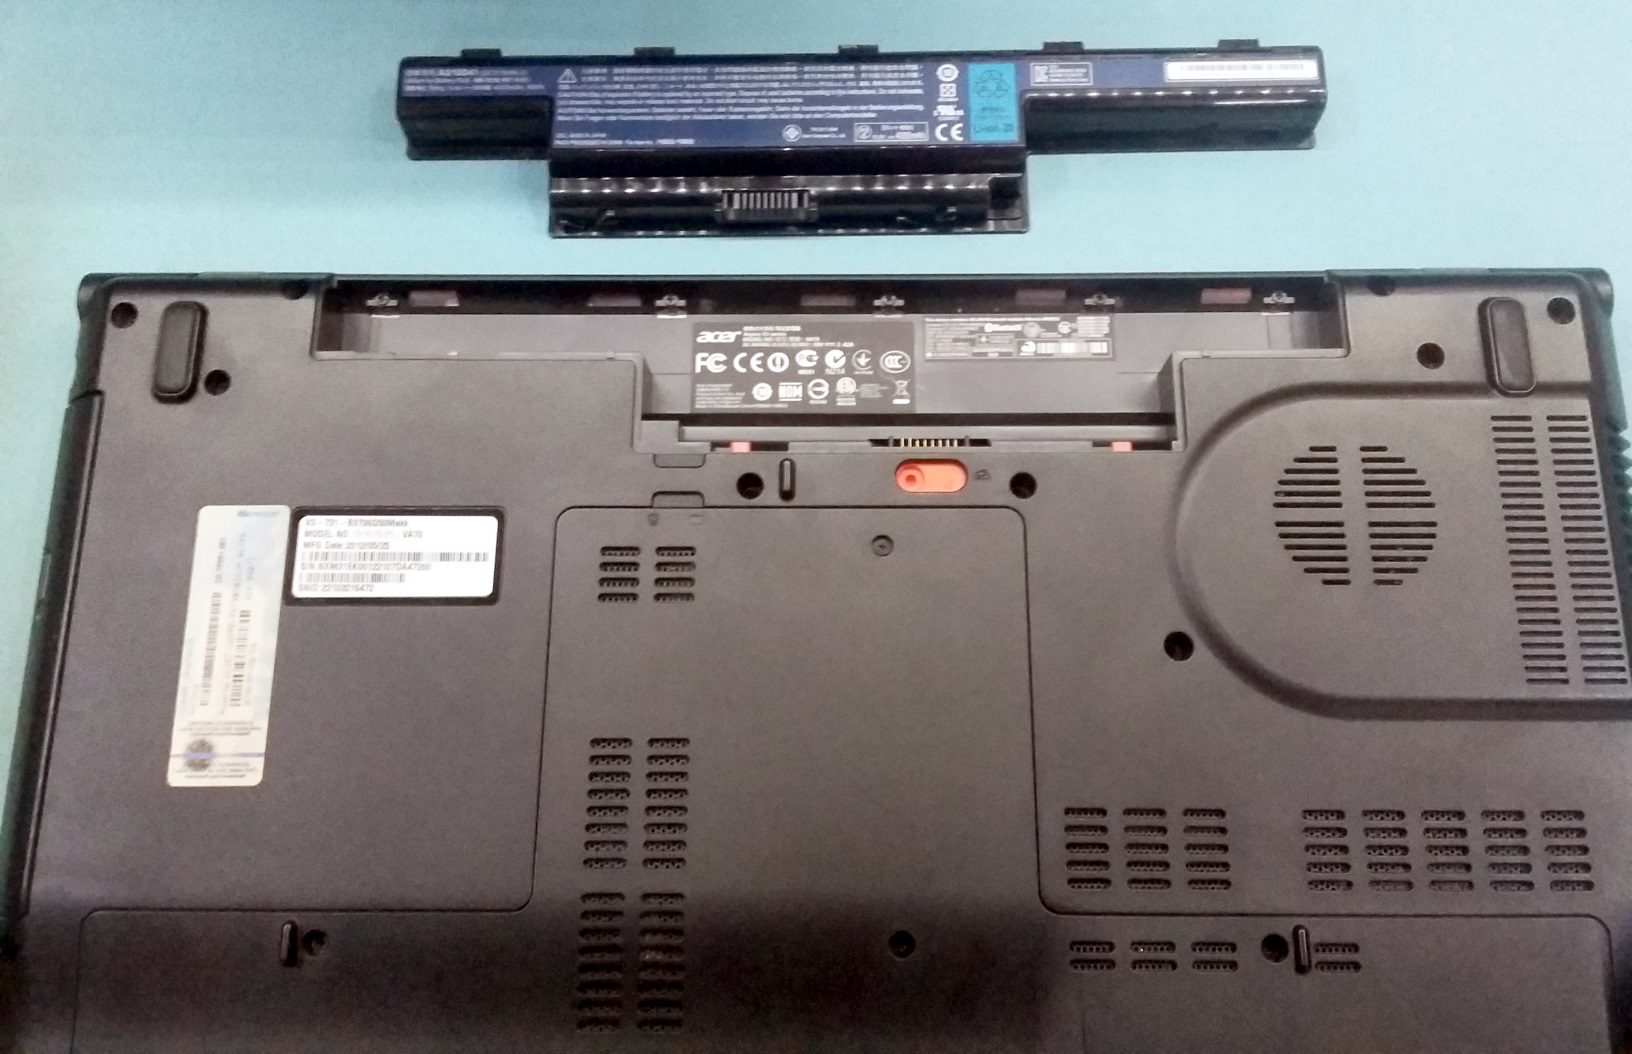
Make it safe to work on
I shut the machine down completely; there was no hibernation or standby for me. I flipped out the battery and put it to one side.
Remove all of the things
I like to pull out as much as possible right at the start and put them aside for safekeeping. The more pieces you can remove, the better.
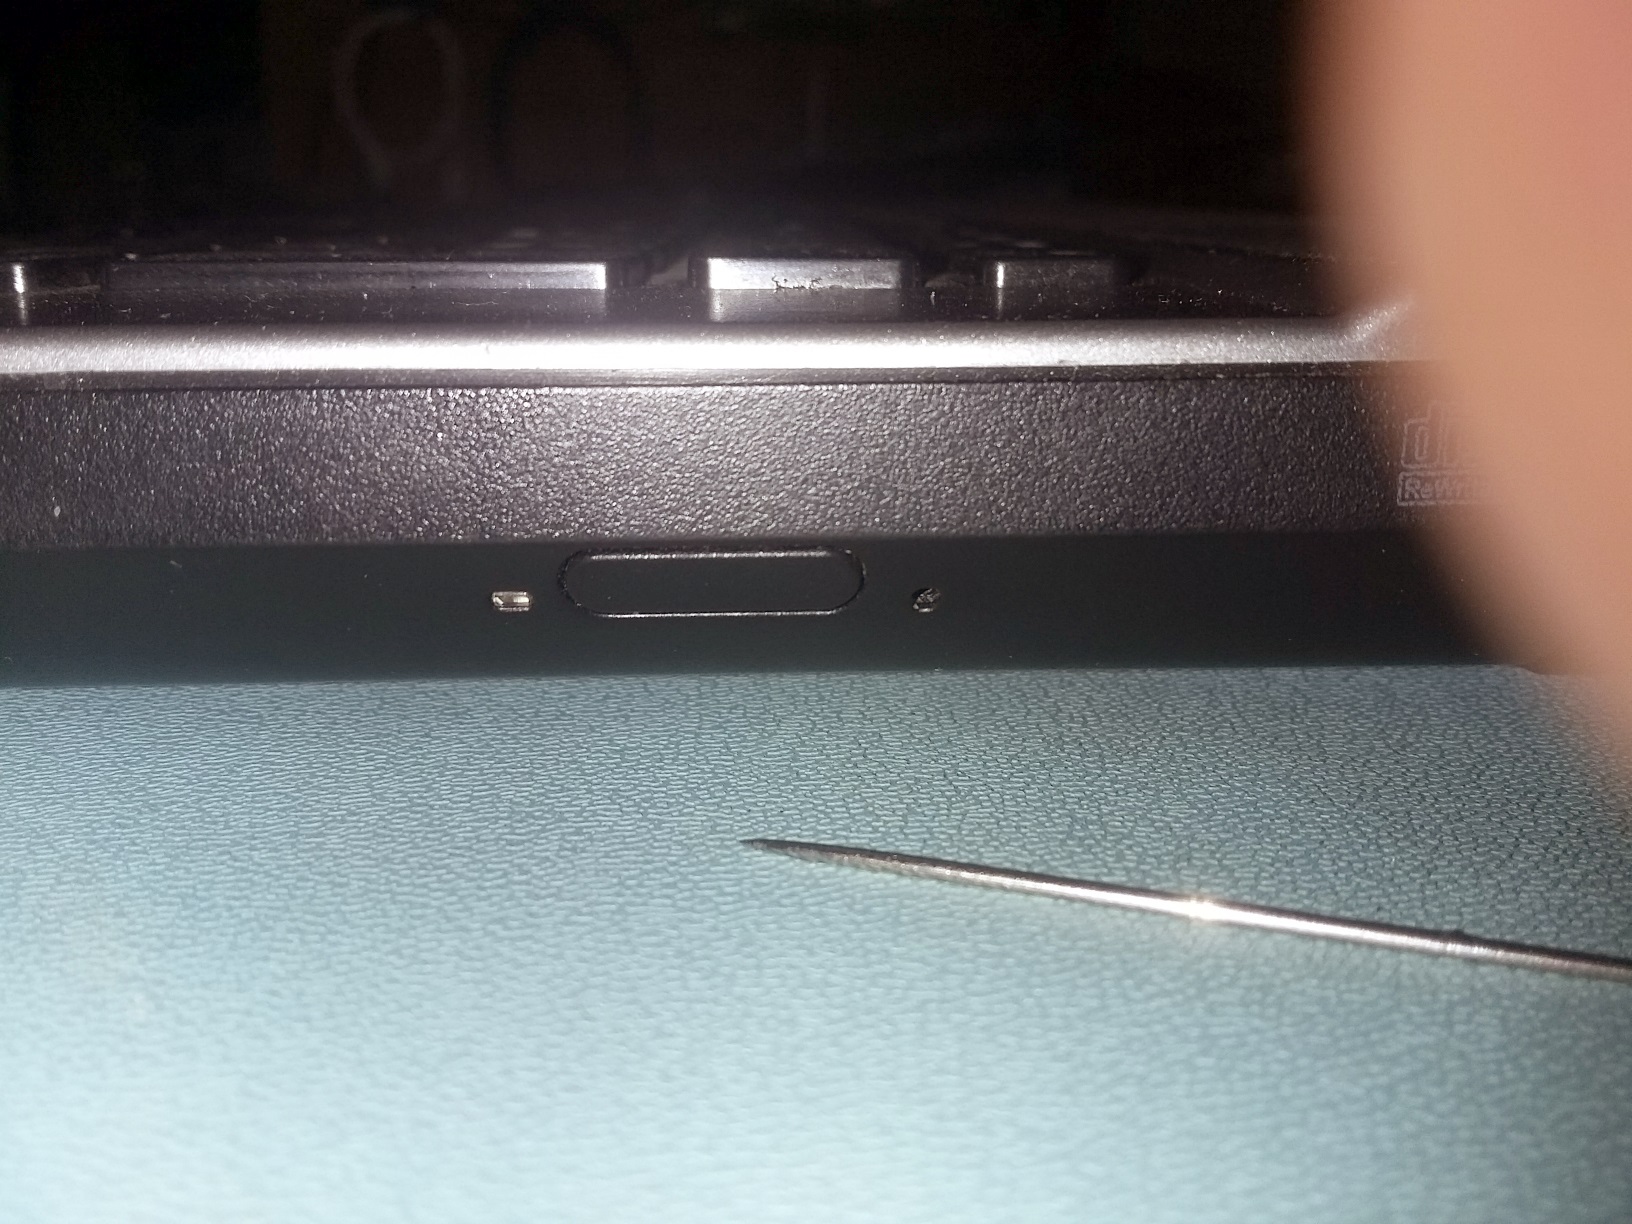
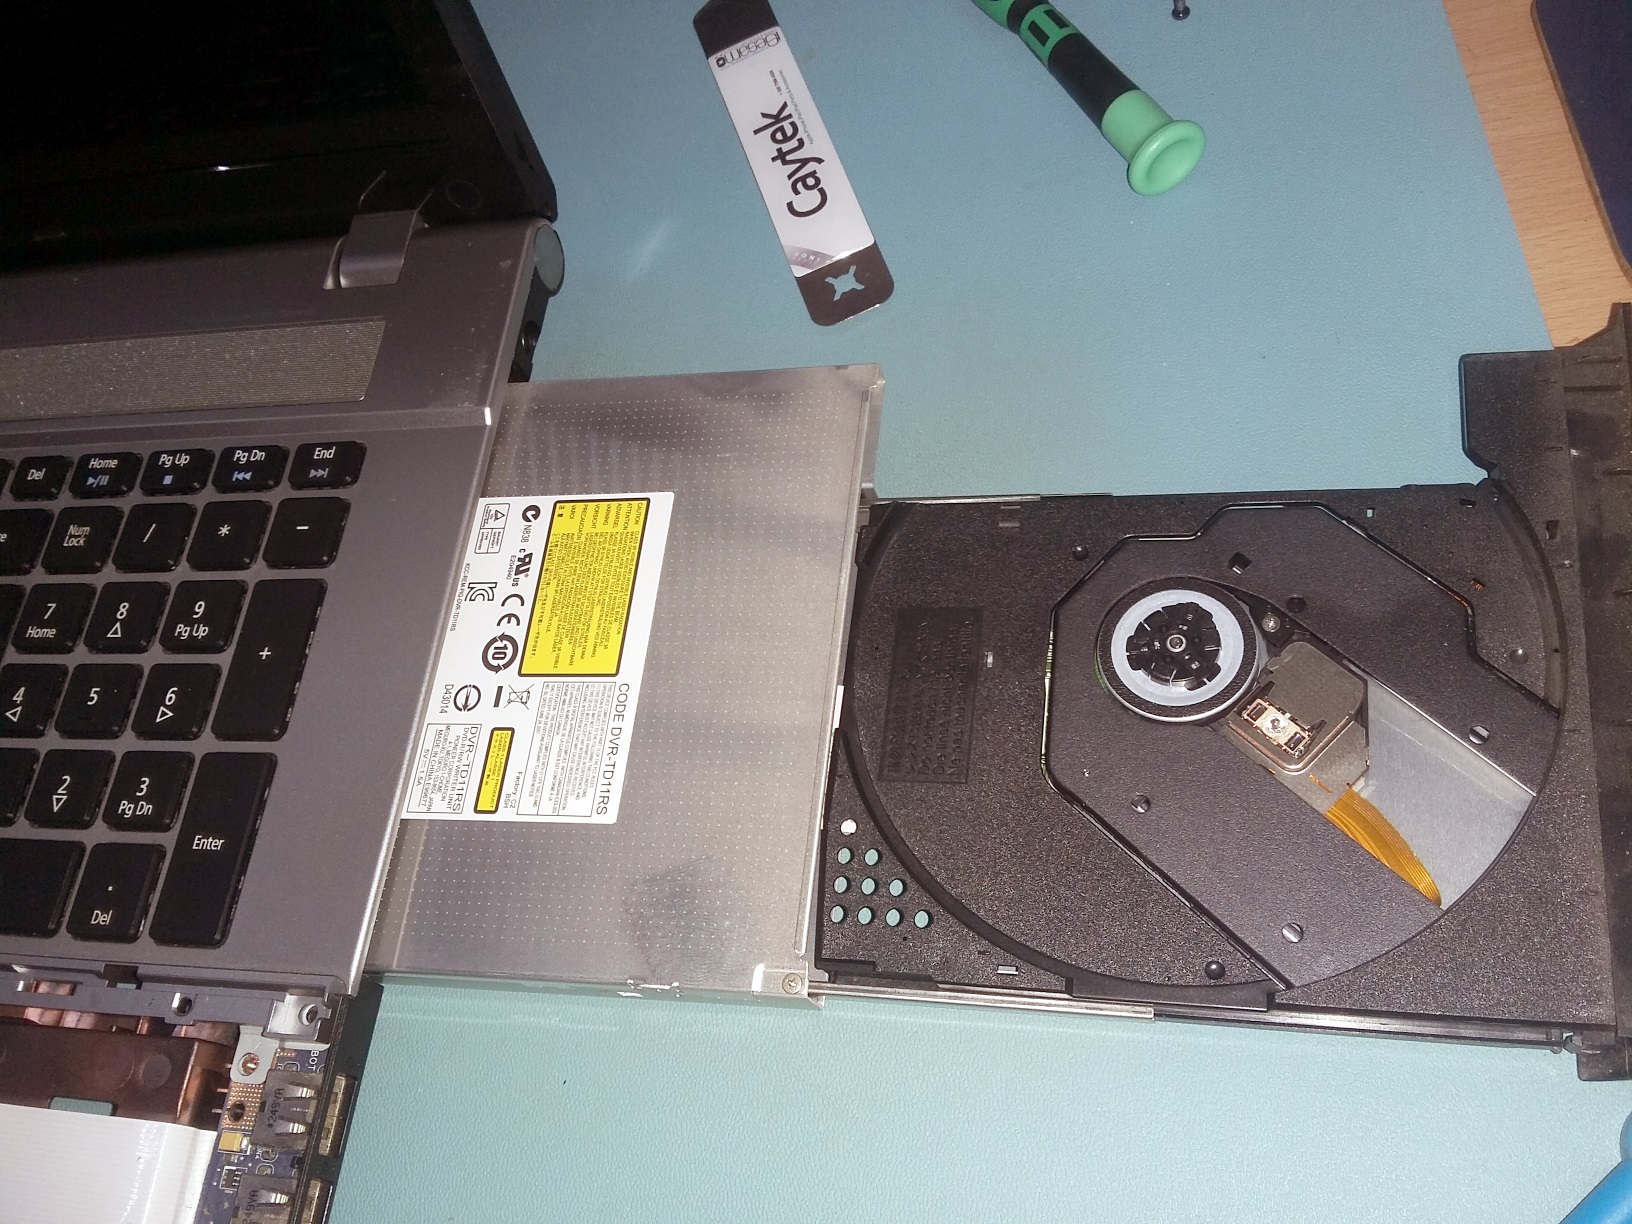
In this case, removing the optical drive was non-optional. Unfortunately, in my haste to shut the machine down, I neglected to eject the drive. This was not an issue; I inserted a fine needle into the manual eject hole to see on the right. After that, removing the drive was simply a matter of pulling on the DVD sledge; the whole thing came away in one piece.
There are a few upgrade options for this laptop, so a separate bottom panel (with sensible captive screws) can be removed. This reveals the memory slots, wireless card slot, SSD upgrade slot, and not one but two hard drive slots. This is a big laptop, with a 17.1″ screen, so there is plenty of space inside for extra toys.
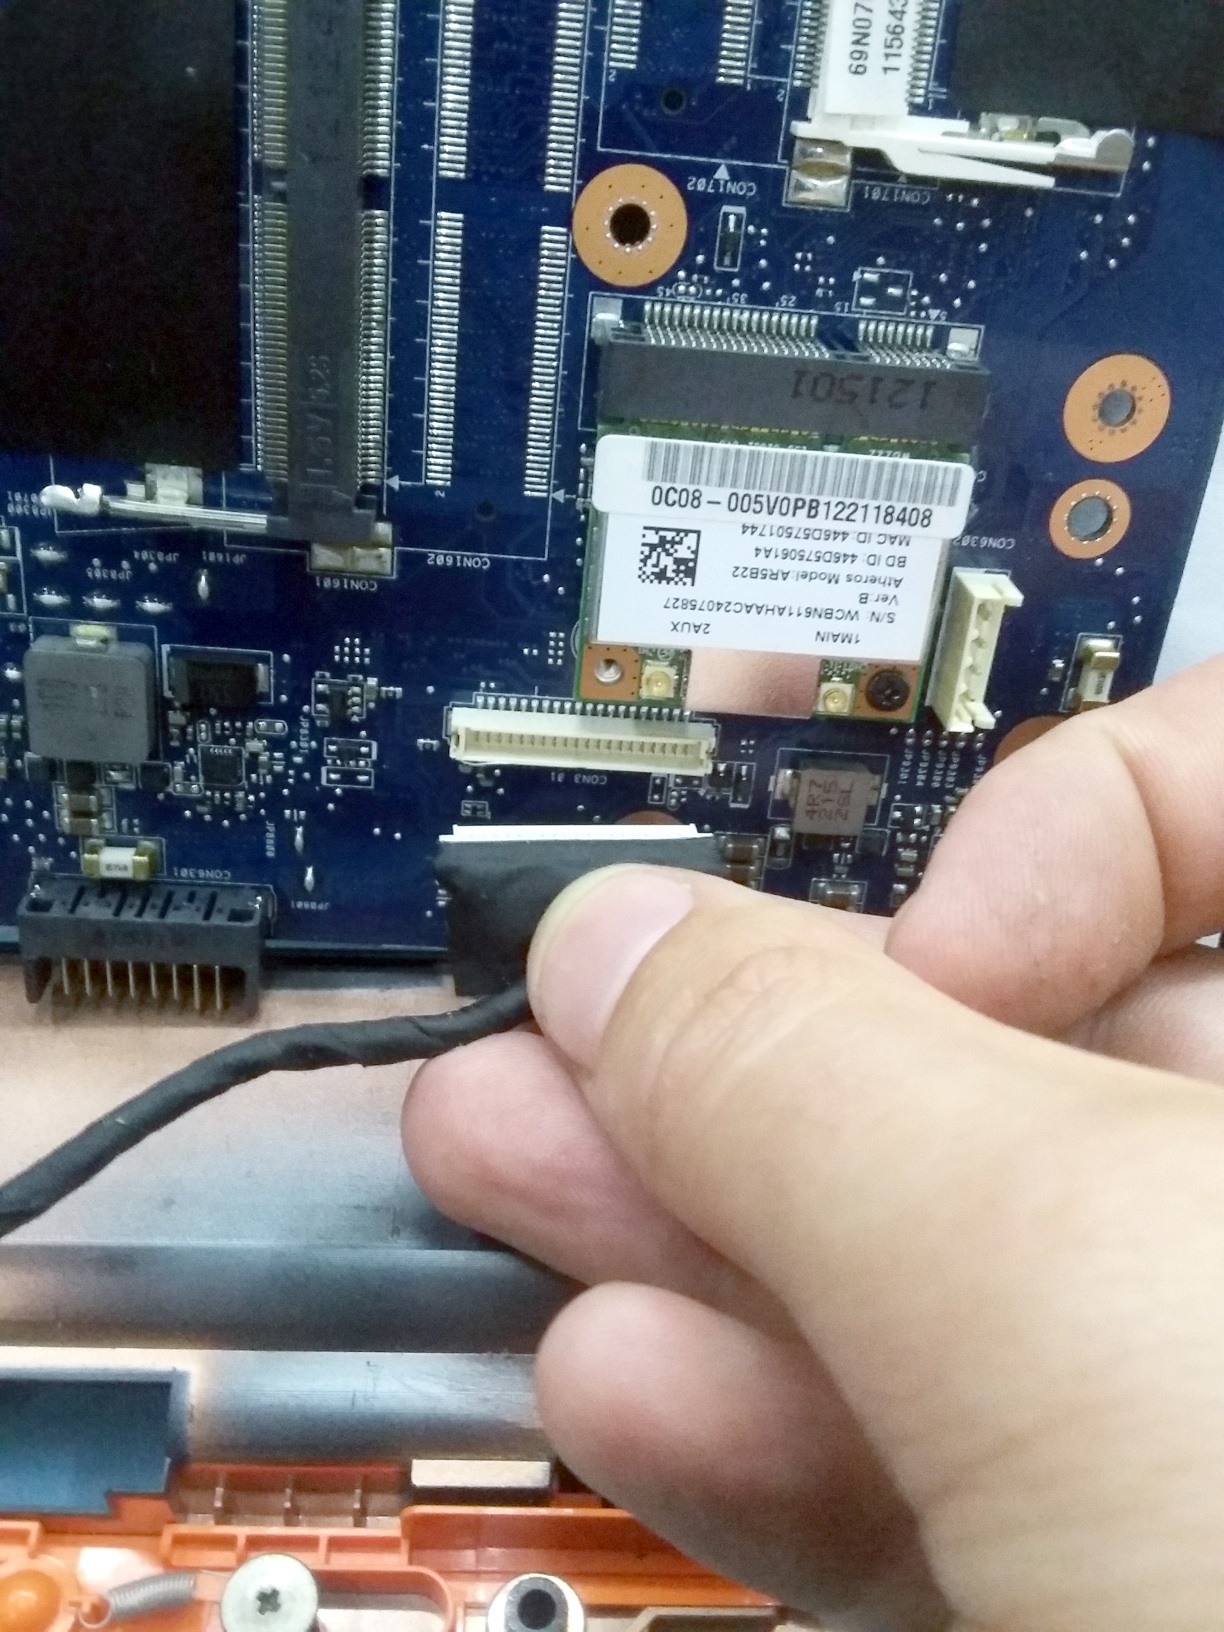
The next task was to remove the hard drive, RAM DIMMS, and wireless card and set them aside somewhere safe (and ESD safe, too!). We didn’t want to damage them accidentally.

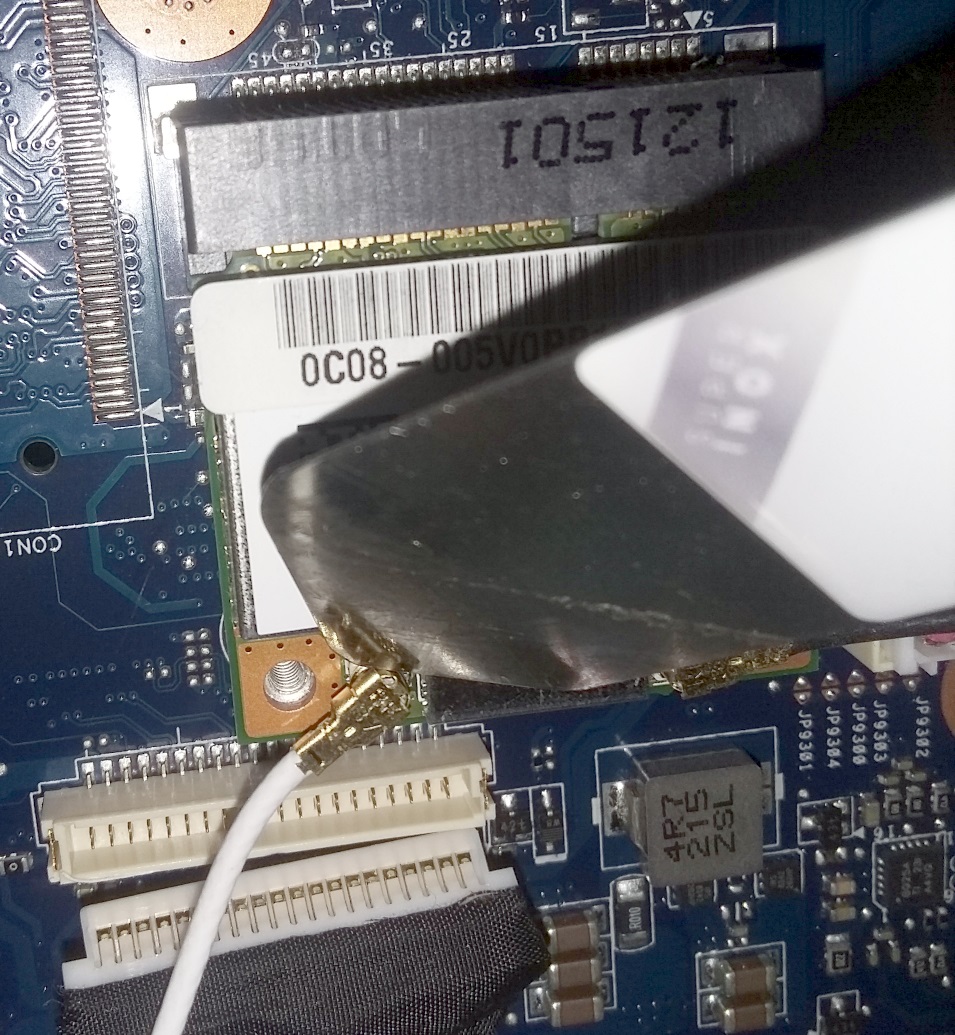
A word of caution regarding flying wireless wires, with dinky little micro RF coaxial connectors – don’t pull them off with the wires. If the crimping is not up to standard, you’ll weaken or even rip off the connection. Then you’ll have a bad day. Merely pry under the connector gently, with a spudger, and it will pop off.
Unscrew all the screws
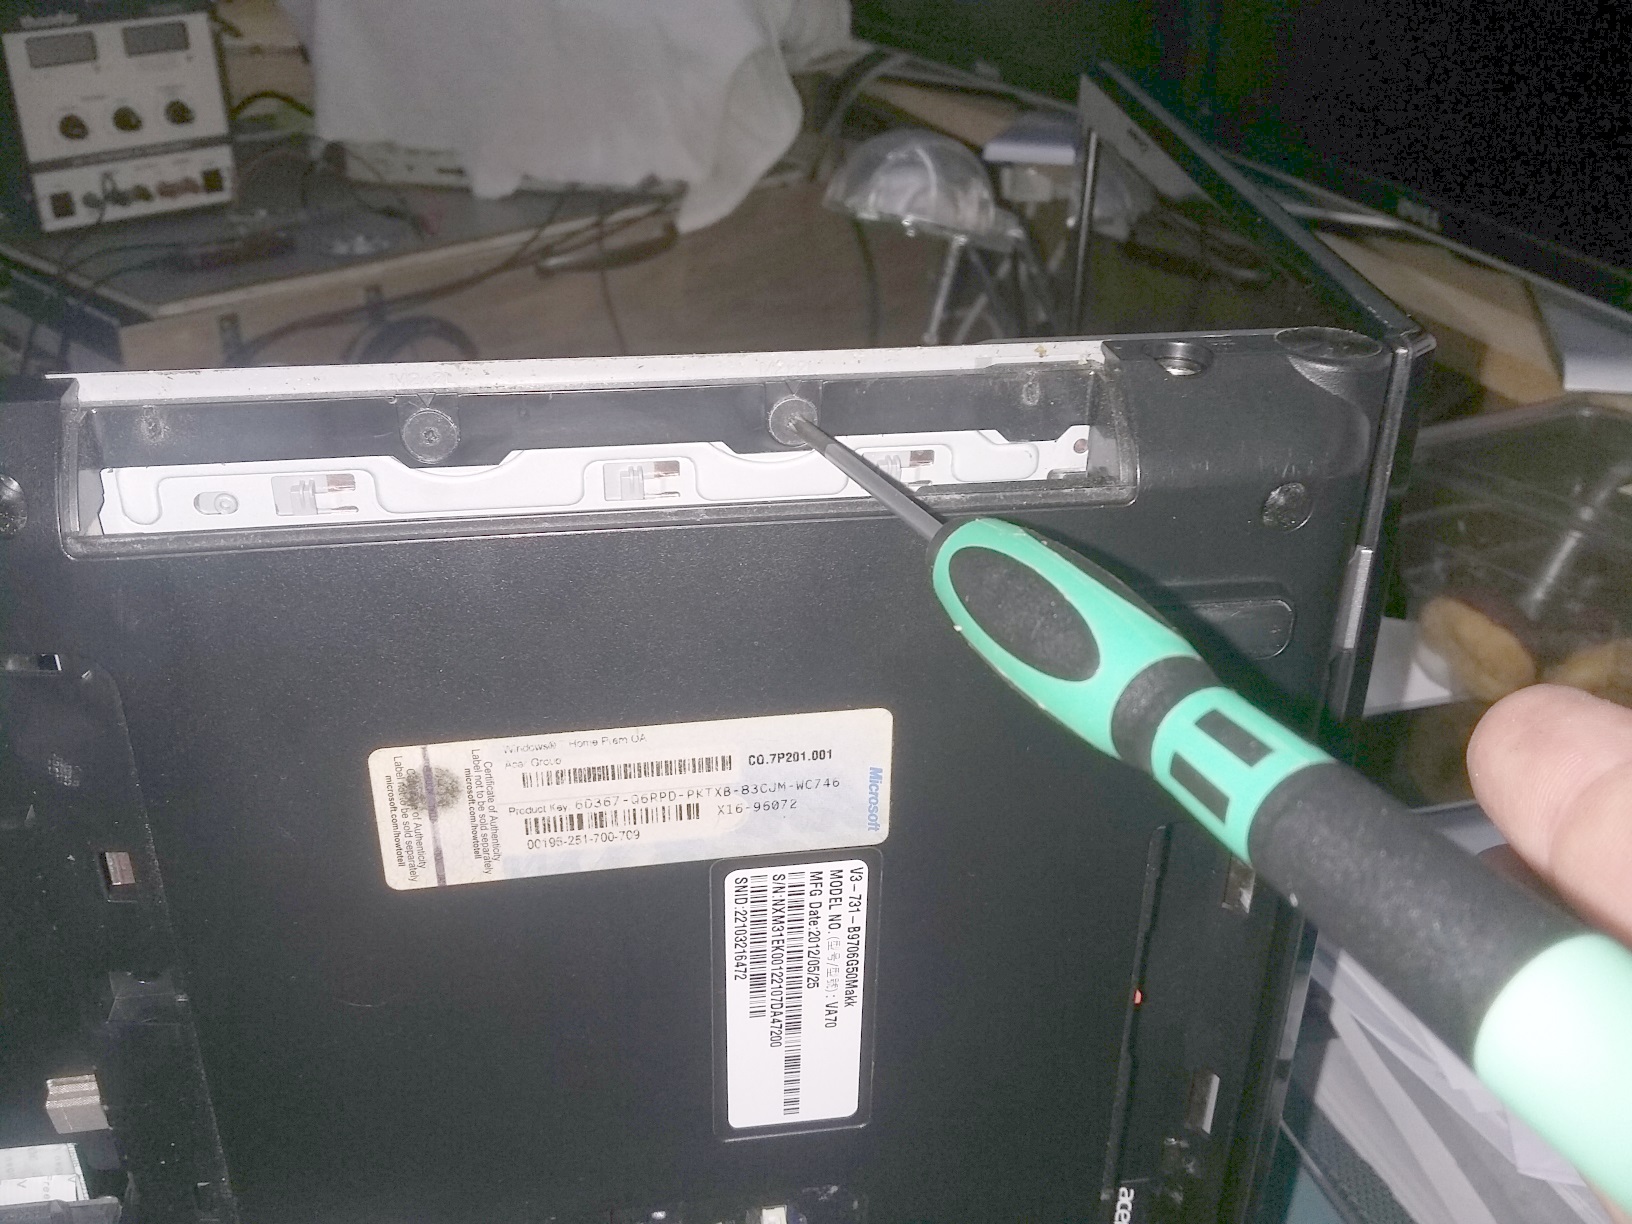
I find it hard to work out which screws to remove and which not to when doing partial disassembly. In this case, it was a total strip-down, so I removed all the visible screws in the case’s lower half, making notes as to the number and size/type of each one and where it came from. Trust me, make notes now, and save the pain later. There were only three types of screws in this case, so it was quite painless. Well done, Acer.
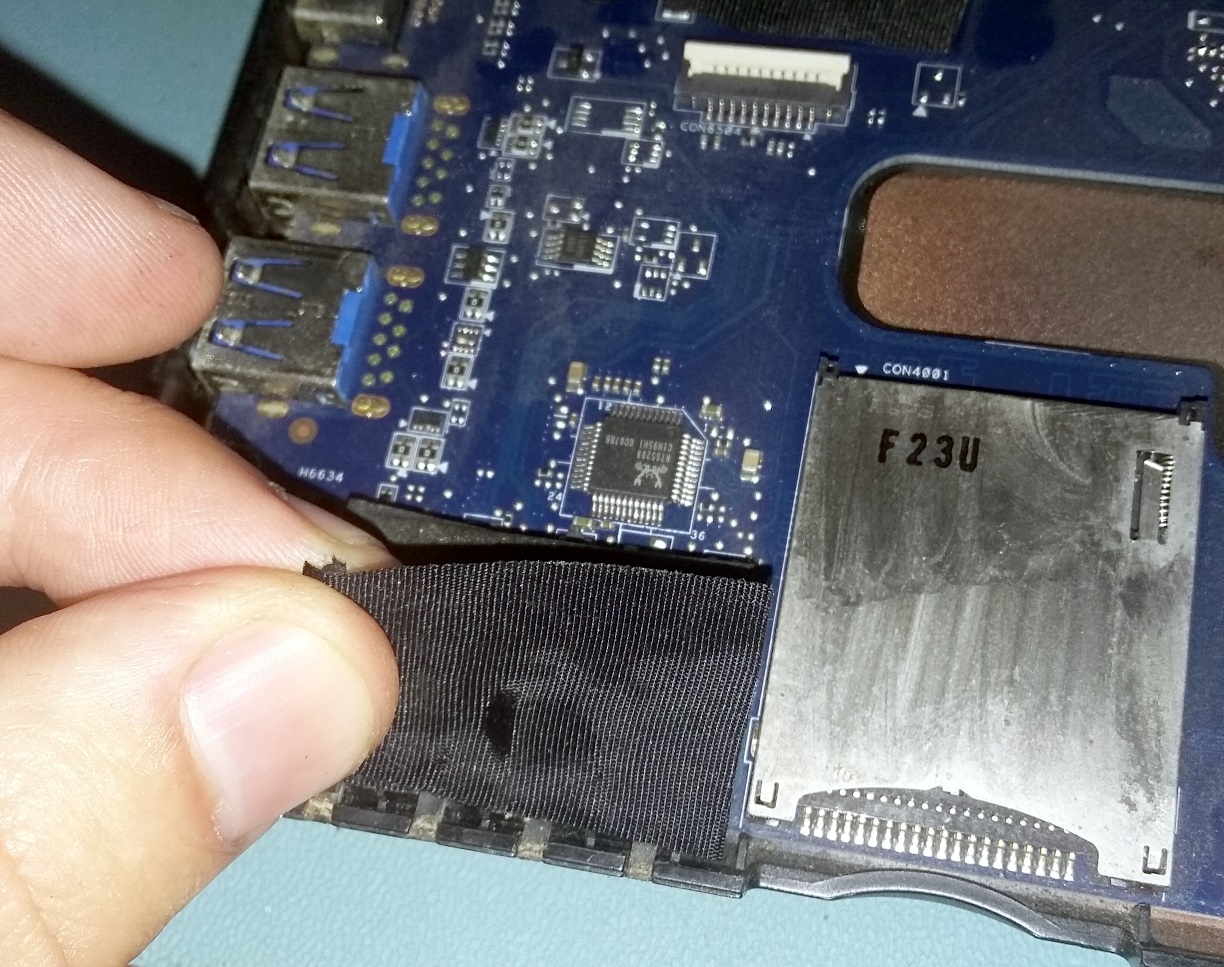
Disconnect the cables to the mainboard

Remove the track-pad and keyboard assemblies
The plastic around the trackpad was not held together with screws, just plastic clips around the edge. I needed to carefully apply the spudger around the join between the upper and lower parts, all the way around the left, bottom, and right edges, a little at a time. A little pressure and a bit of a wiggle allowed me to slide it along until the assembly came away.
It was exactly the same with the keyboard assembly. A couple of screws held the keyboard down to the mainboard. Another ribbon cable was removed, and the keyboard was removed to reveal the whole mainboard.

To get the mainboard out, before removing the screws, I peeled back the fabric cover over the LED bank.
Removal of the remaining screws will free the mainboard from the clutches of the case.


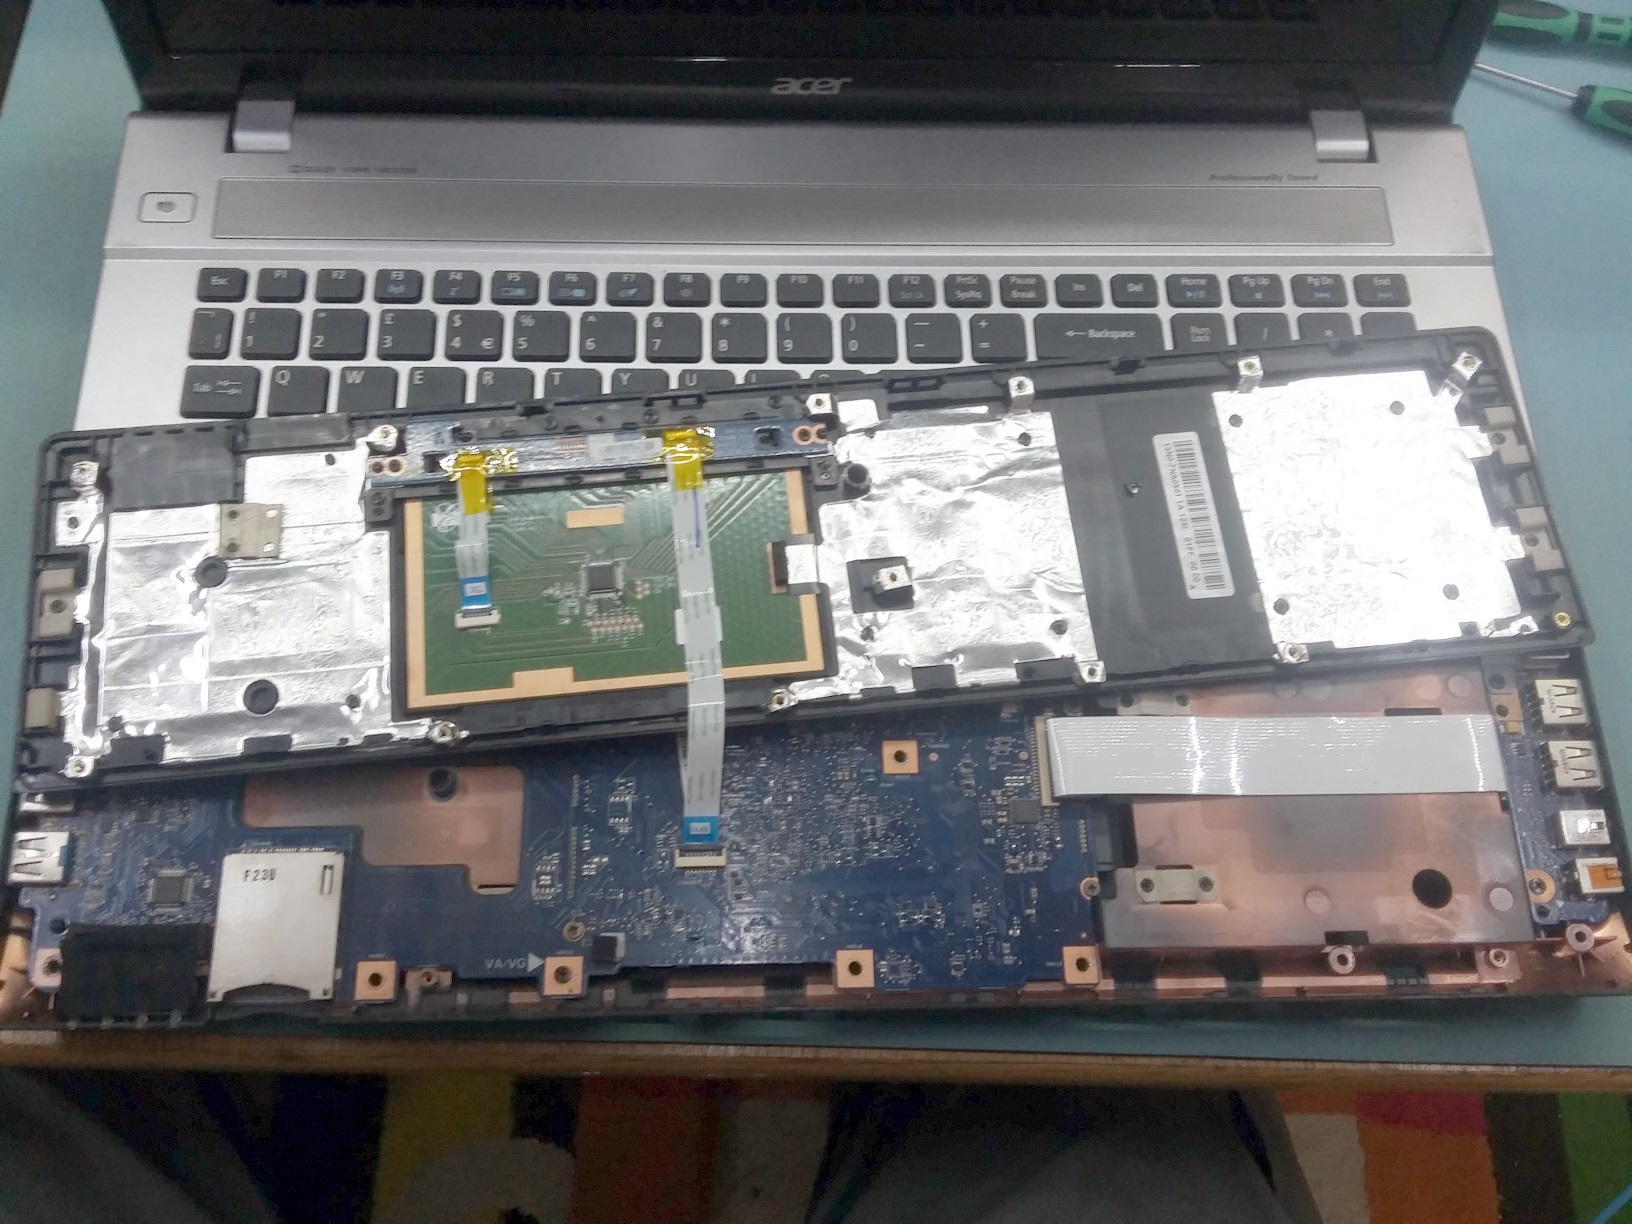
It’s Free!
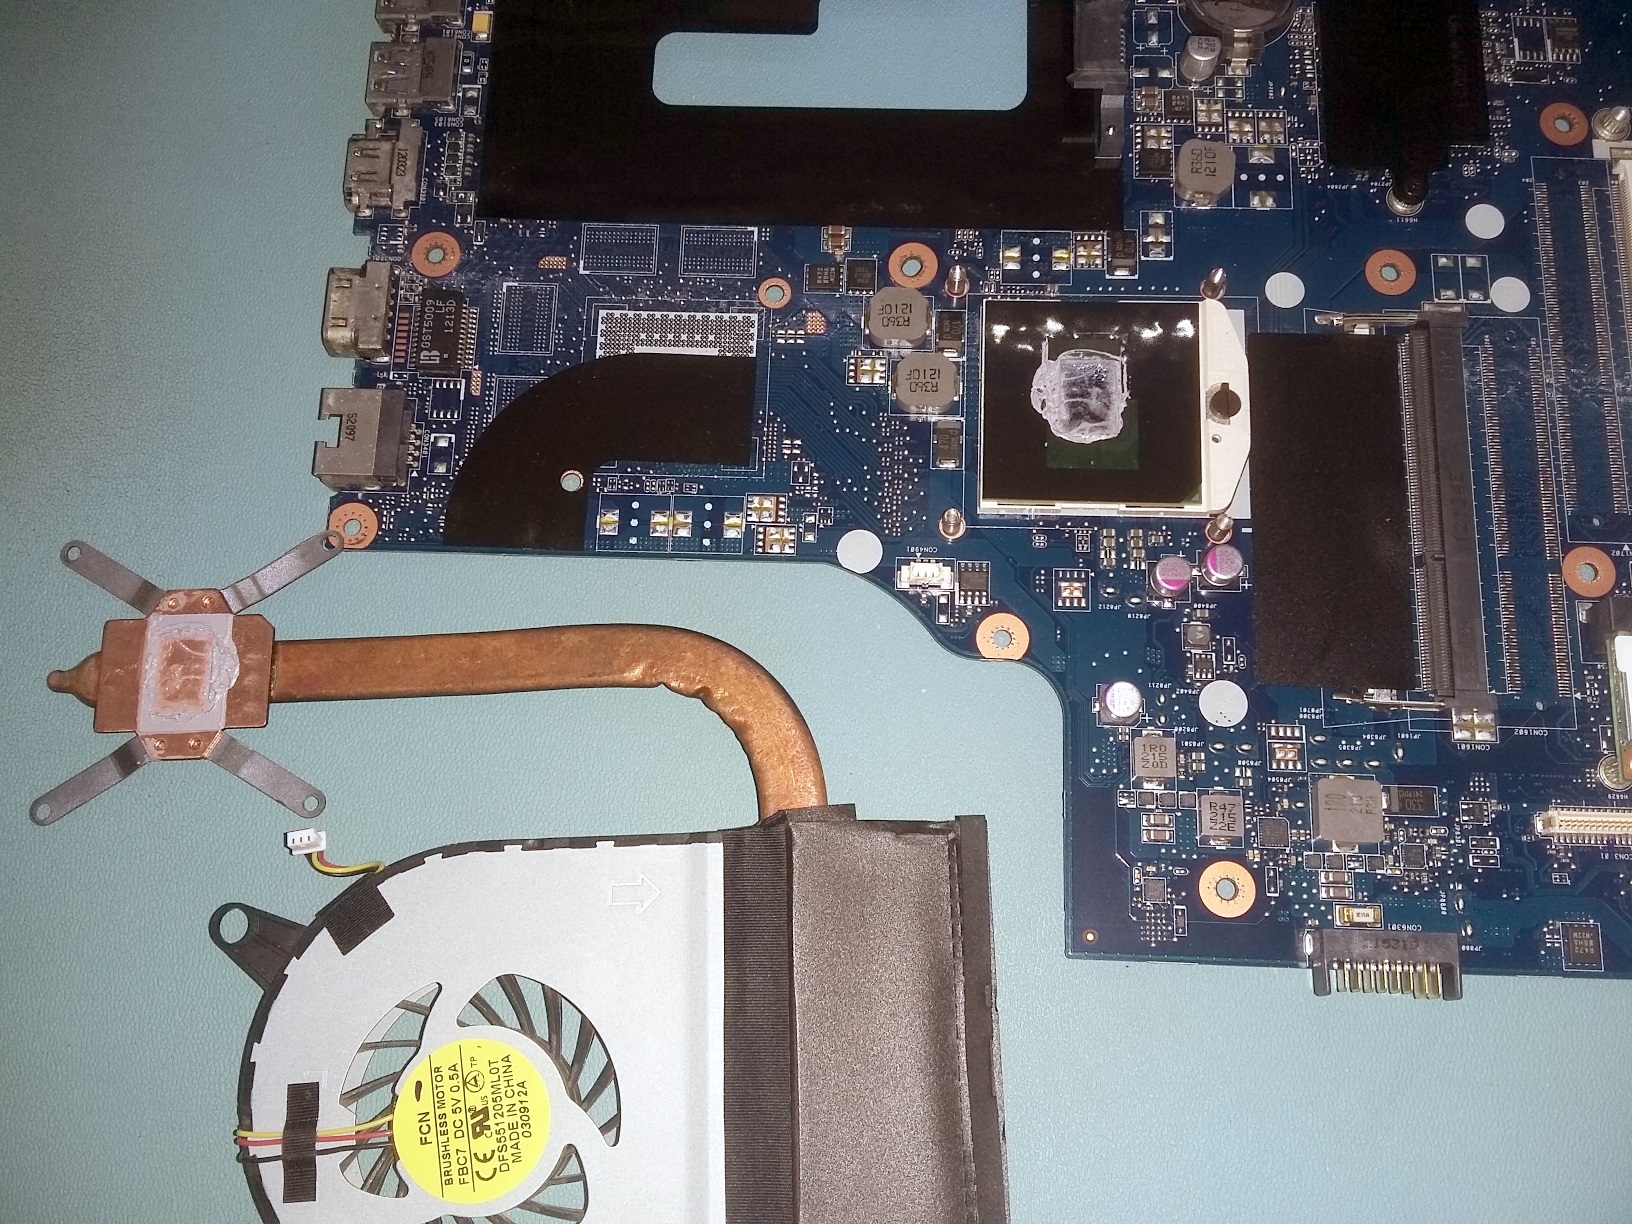
So, once a thousand or so tiny screws had been located and removed, I got this far—a naked laptop. It was evident that it wasn’t generally too dirty, and a bit of a clean-around with the air duster and some IPA got all the dust and grime off.
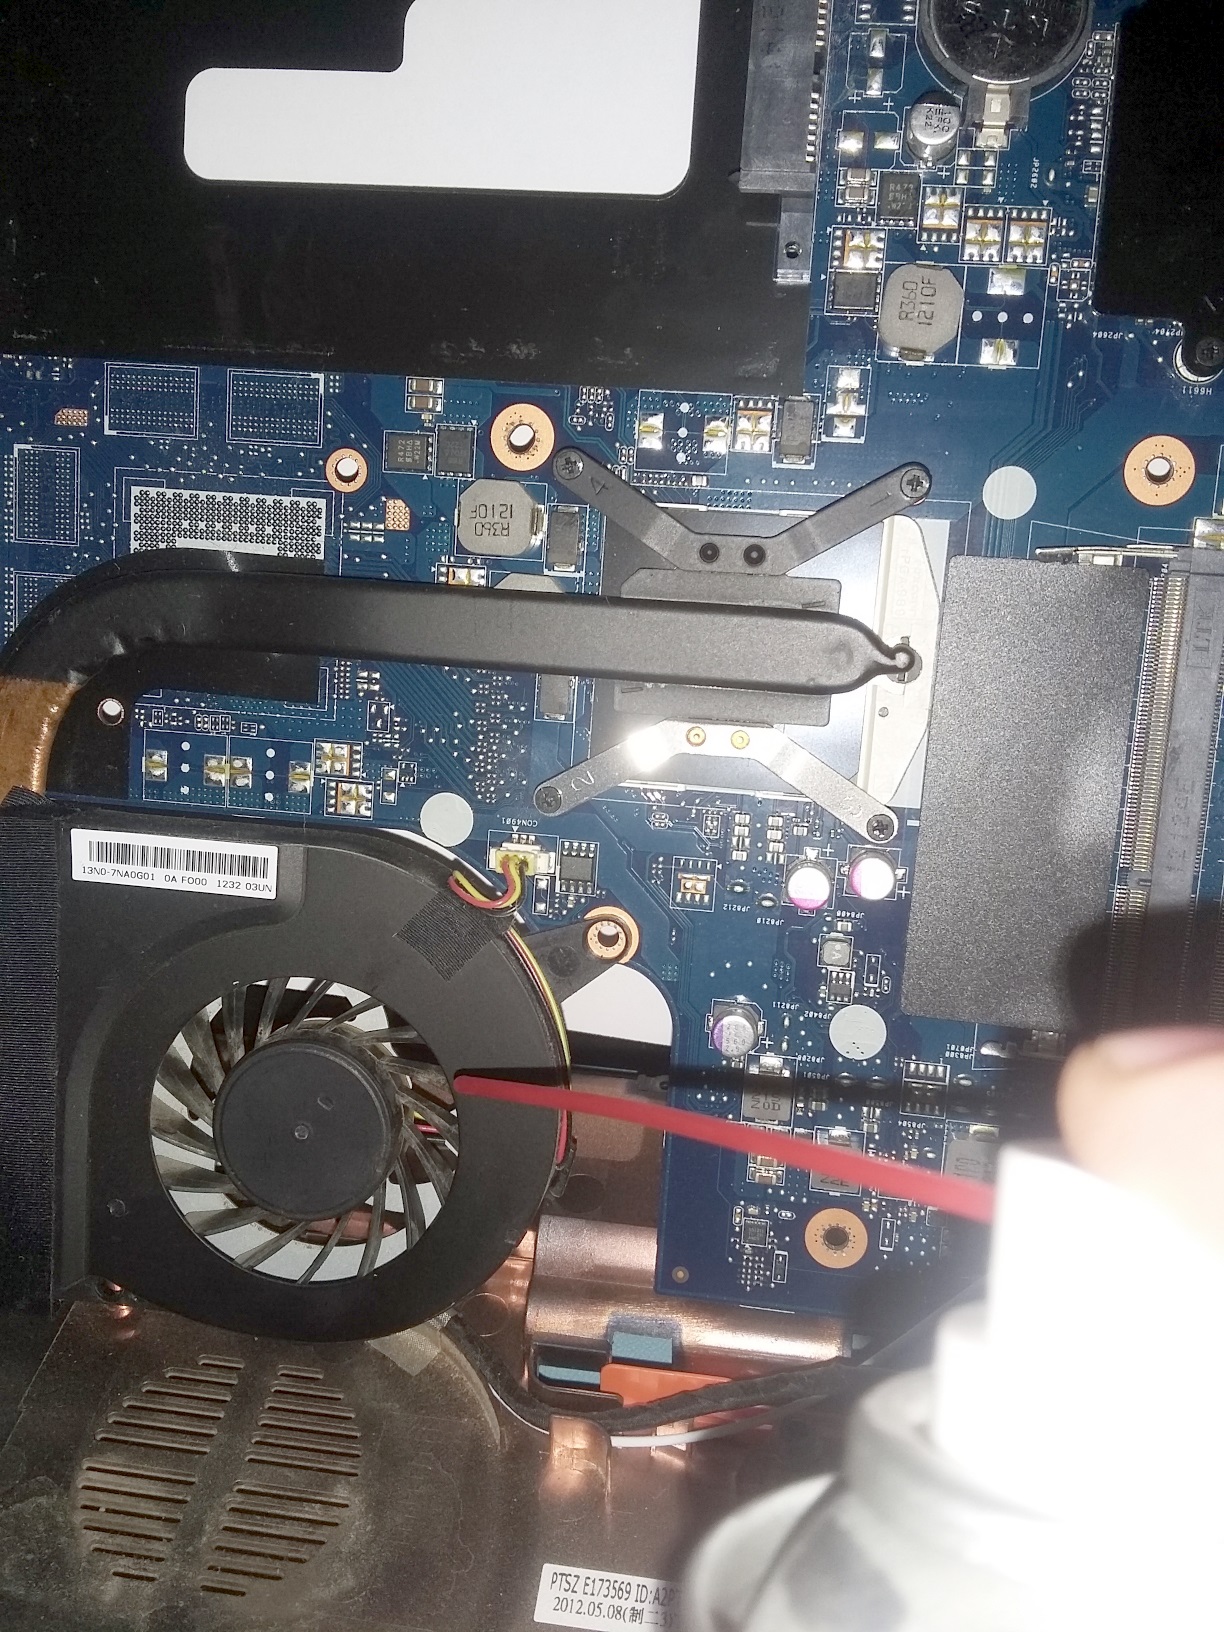
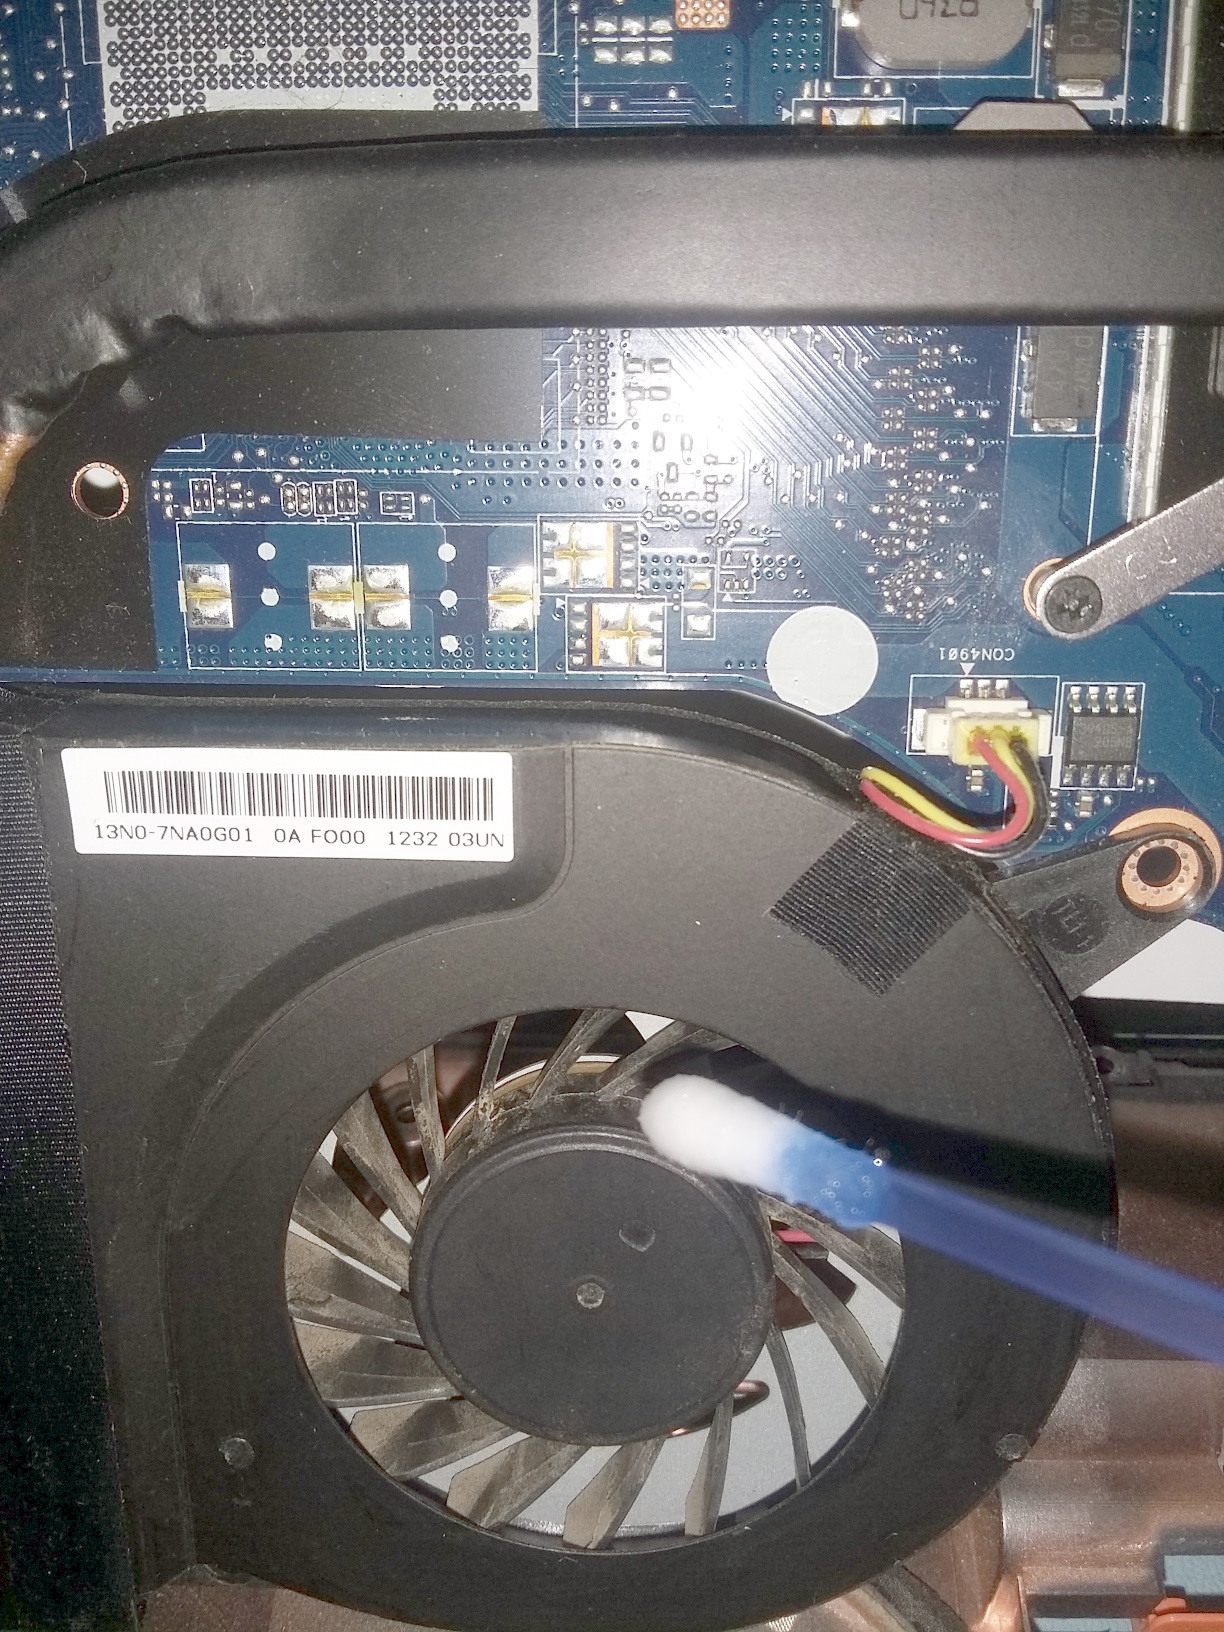
Carefully, Clean the fan impeller
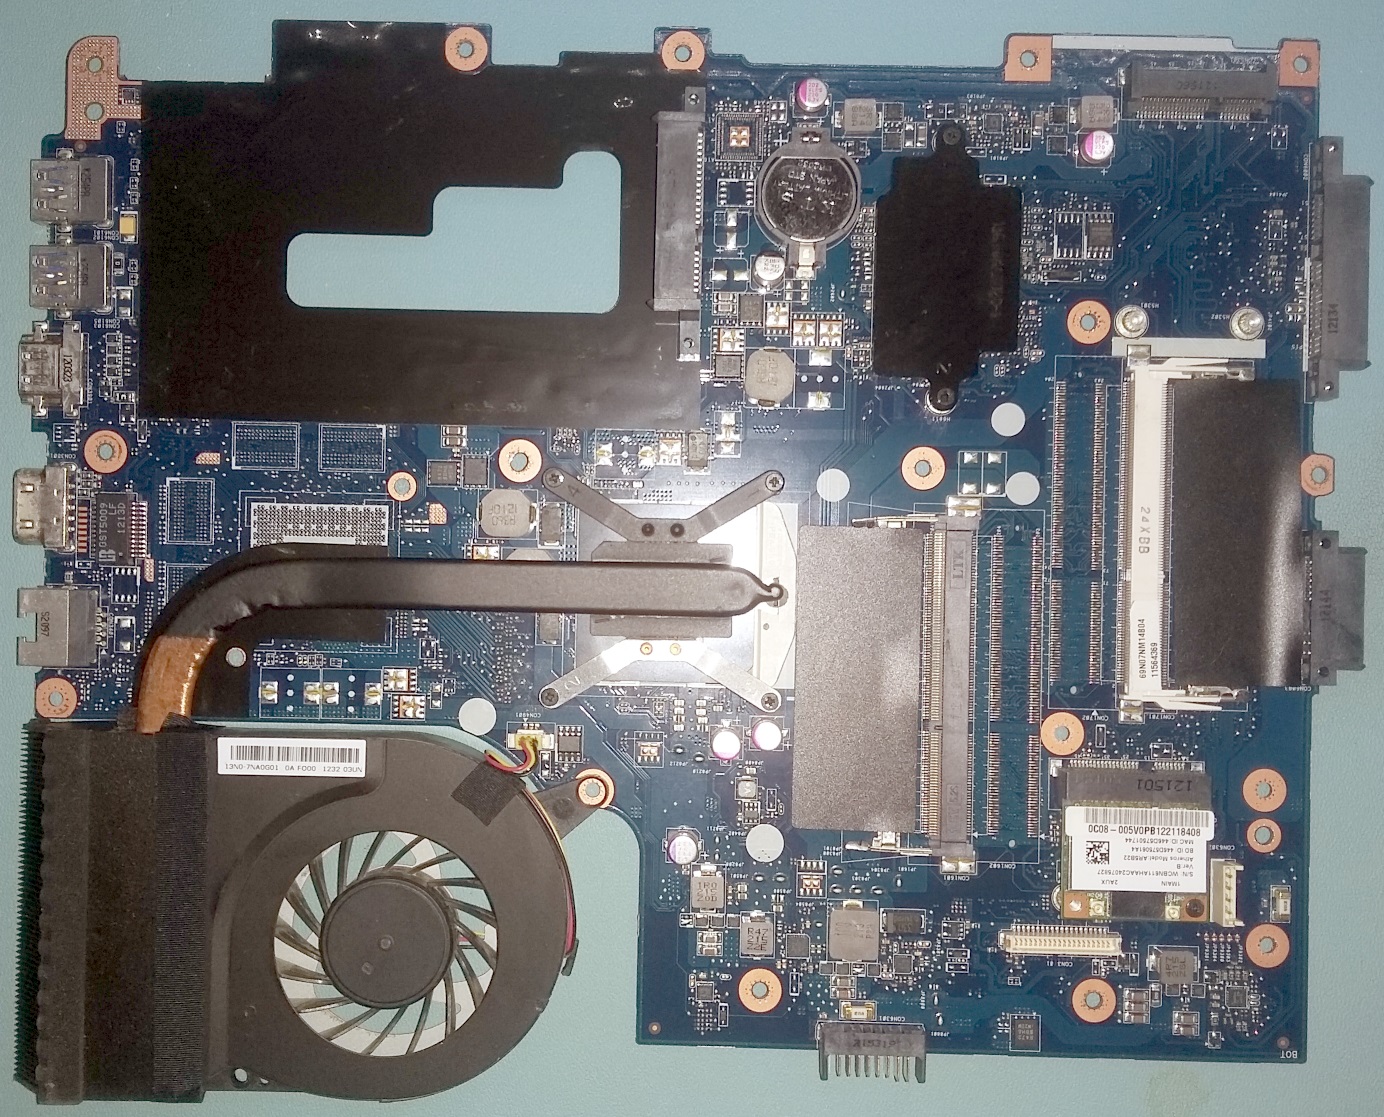
Using the air duster to blast the bulk of the dust out proved that the main problem was that the heat exchanger end of the heat pipe (the far left part of the fan body) was clogged with dust and dirt. The impeller blades were pretty dirty too. I was careful not to allow the fan to spin too fast using the compressed air can, so as not to cause bearing damage. I found it sufficient to stick a finger on it and spin it by hand as the air duster did the heavy lifting.
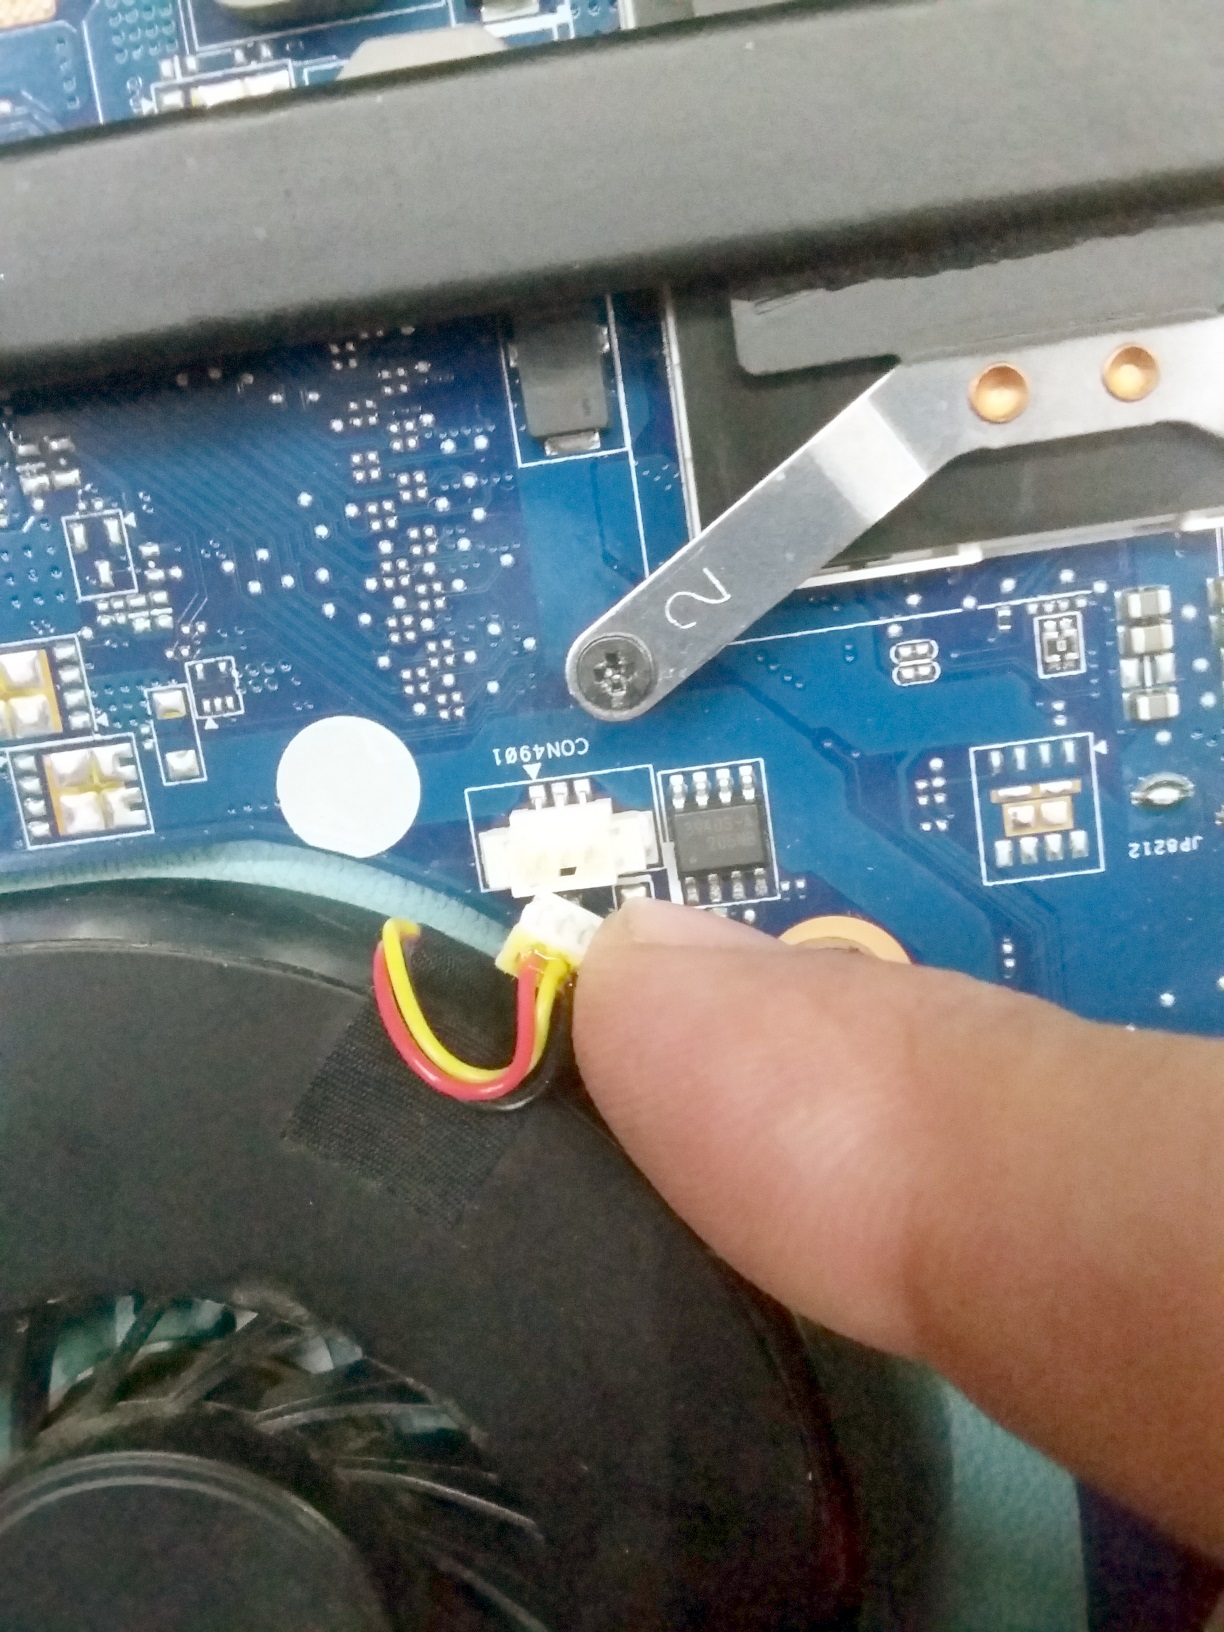
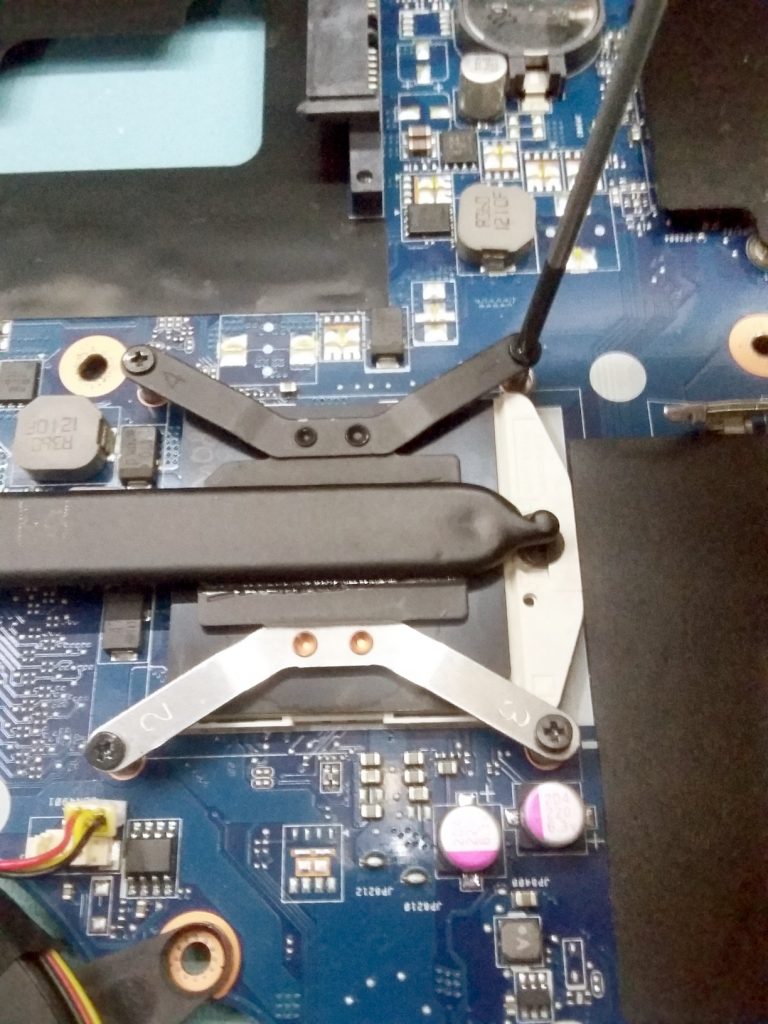
Disconnect the fan & heat pipe
This was pretty straightforward. Just remove the fan connector and the CPU cooler screws in order 1-2-3-4.
Reassembly is the reverse of disassembly
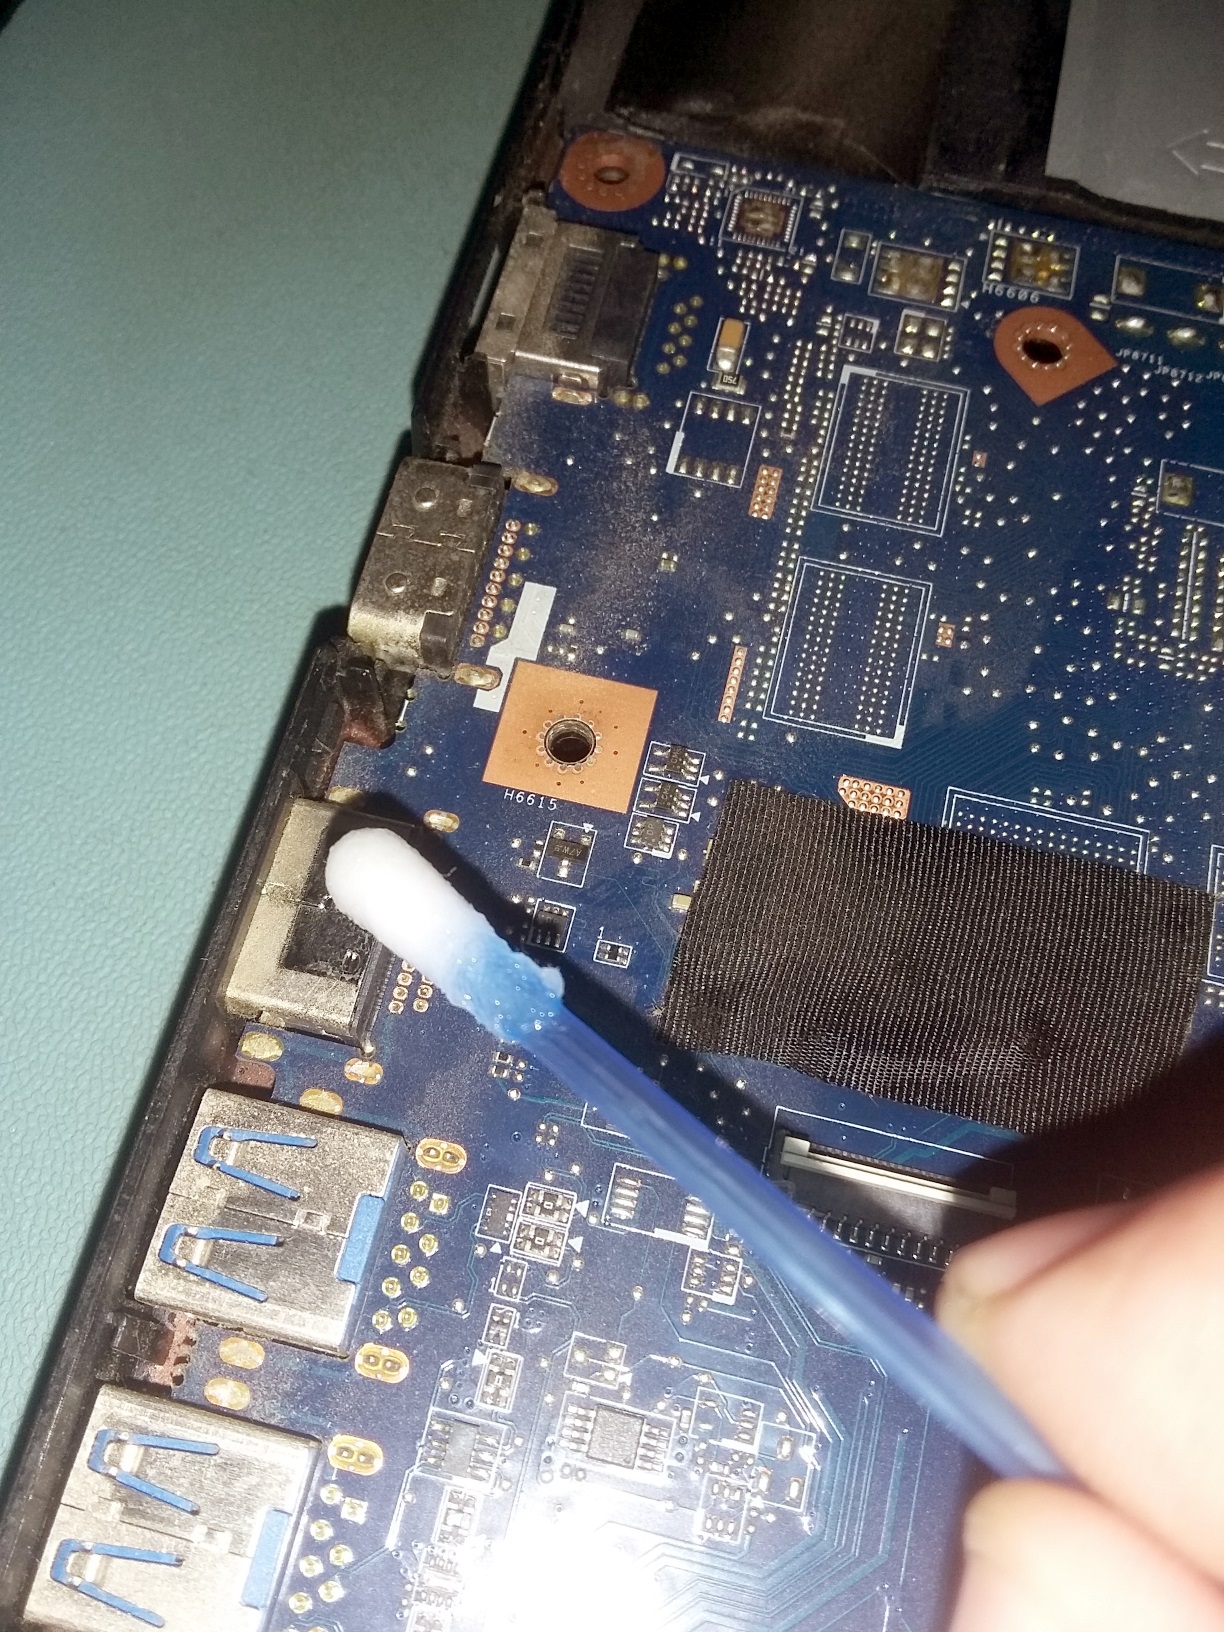
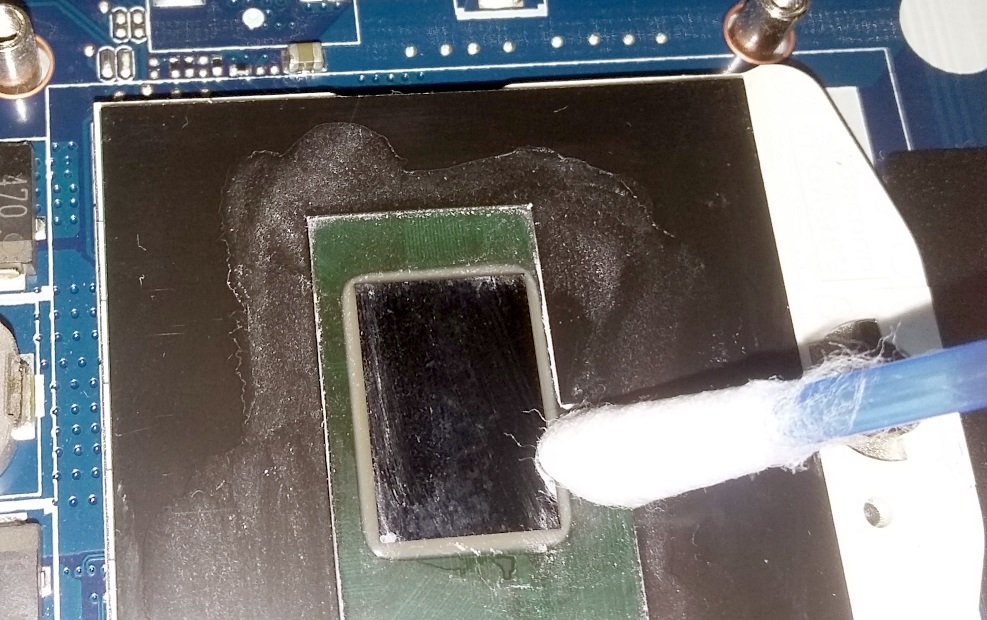
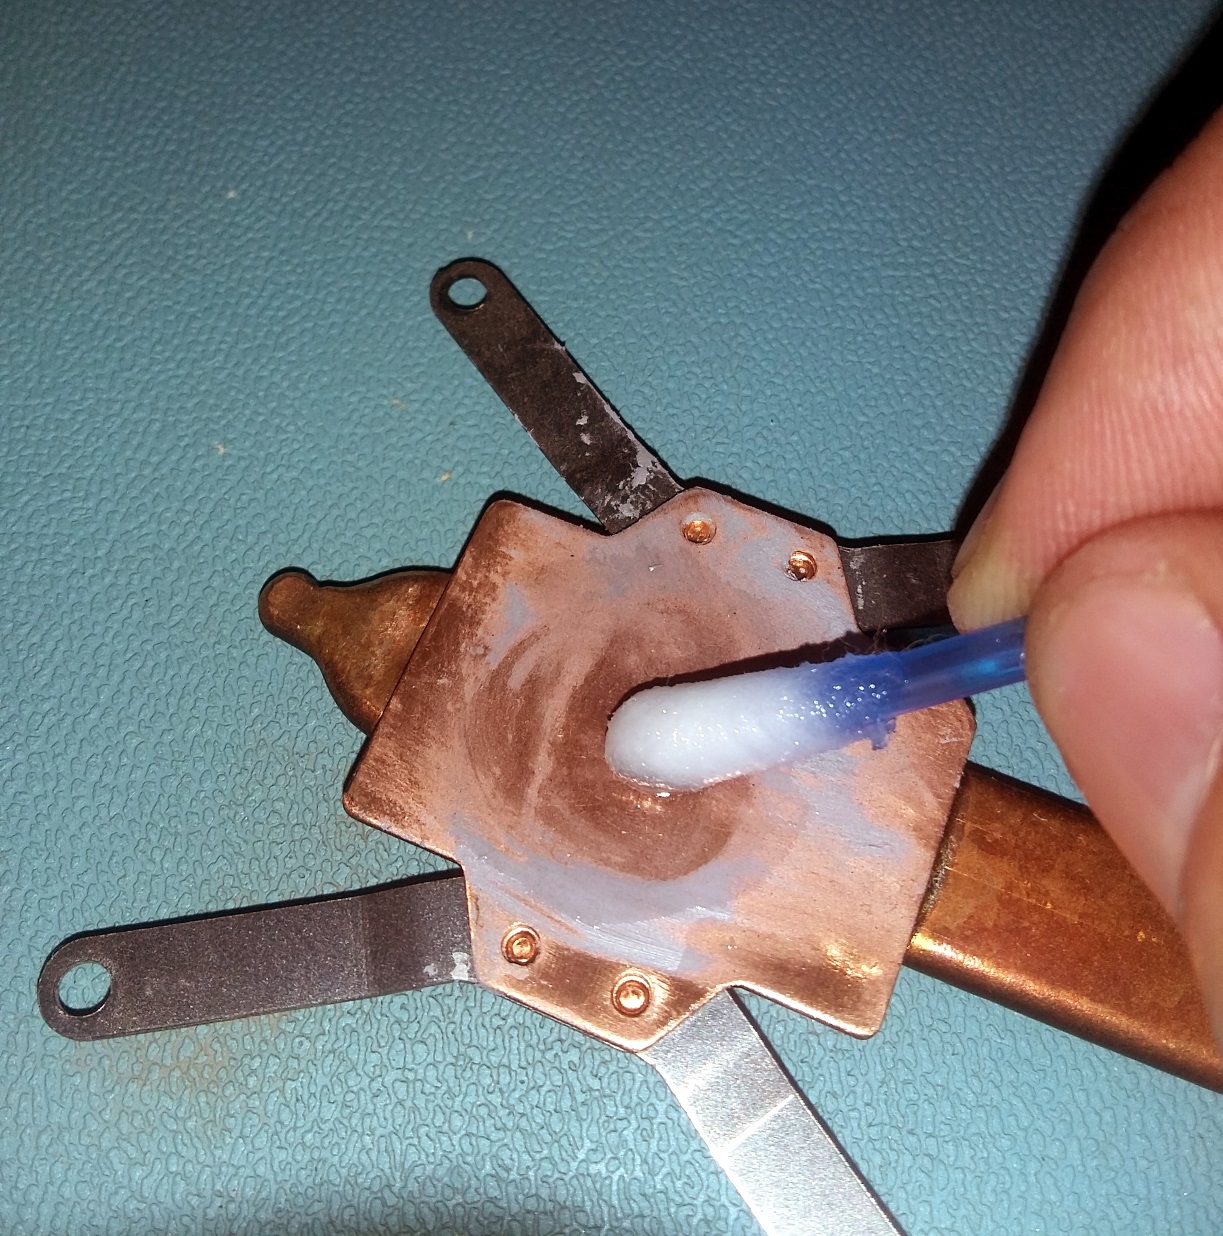
Reapplying thermal compound is simple. I just wiped/scraped off the old stuff, and cleaned away the residue carefully with a cotton bud soaked in IPA, being very careful with the exposed CPU die!
Apply the thermal compound
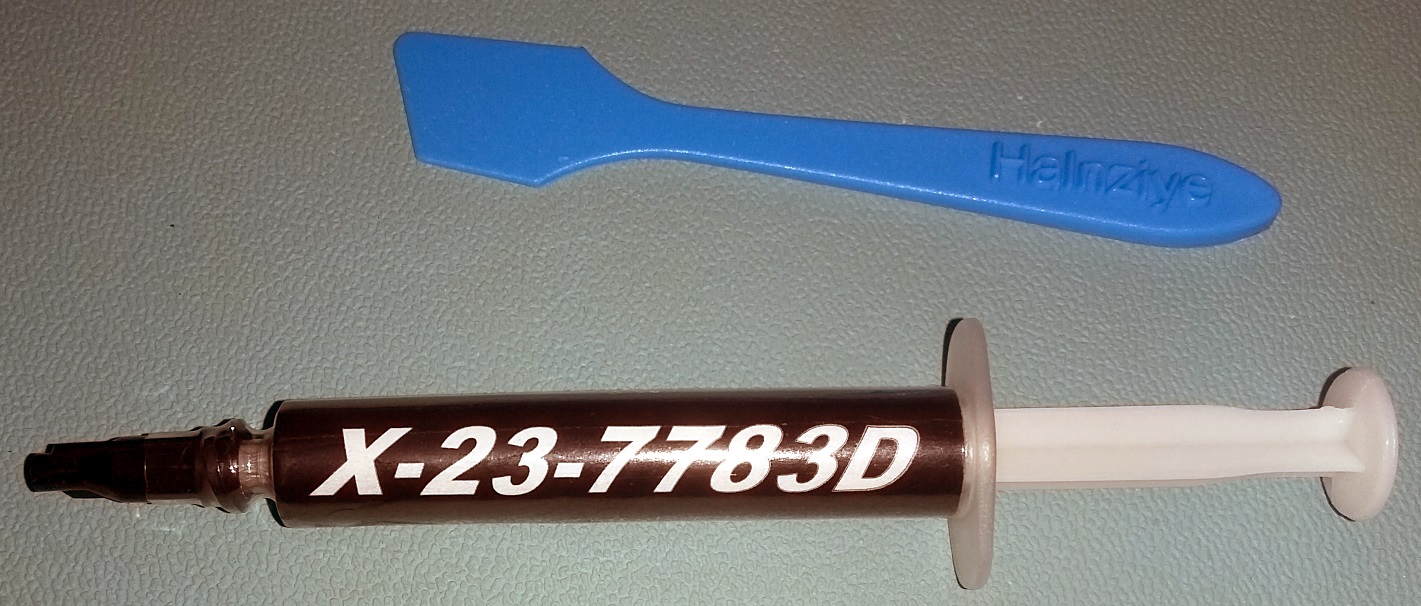
Sometimes called thermal grease, this stuff is more like a liquid gasket material. It is very thermally conductive, being loaded with particles of silver and other thermally conductive materials. Its job is to flow into all the little gaps and maintain intimate contact between the CPU die and the heat sink end of the heat pipe. It doesn’t set hard, is very sticky, and maintains thermal contact as the various components expand at different rates and the CPU temperature varies. It is wise to do some research and buy a specialist, high-performance compound for this very demanding job. The stuff I used is a cheaper Chinese copy of a Japanese product whose name escapes me, but it had good reviews during testing and wasn’t terribly expensive.
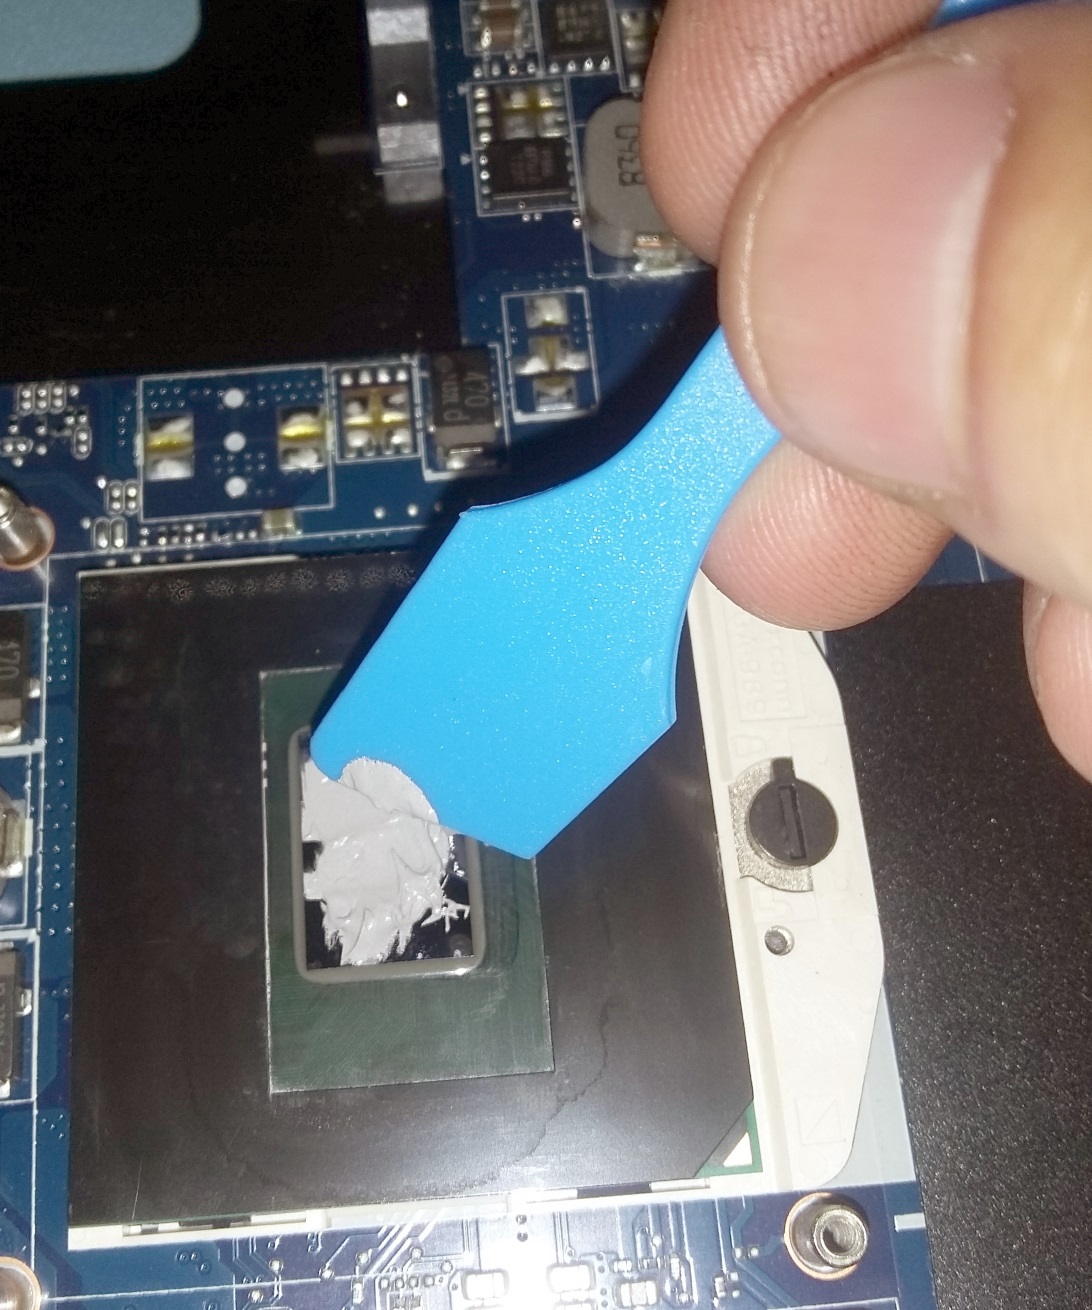
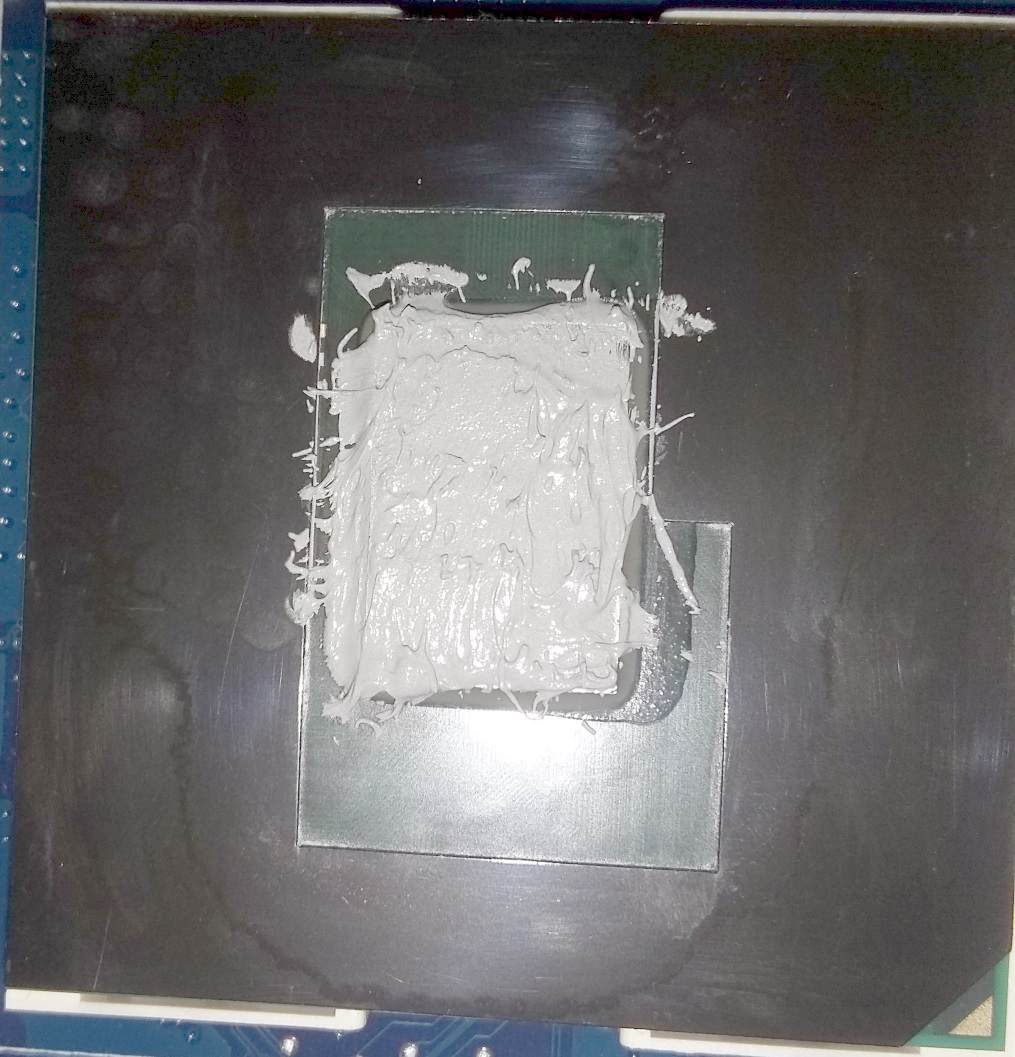
I applied a generous blob directly to the CPU die and spread it into a consistently flat layer. I didn’t worry too much, as the excess would leak out of the sides. I made sure to cover every bit of the die so there could be no hot spots.
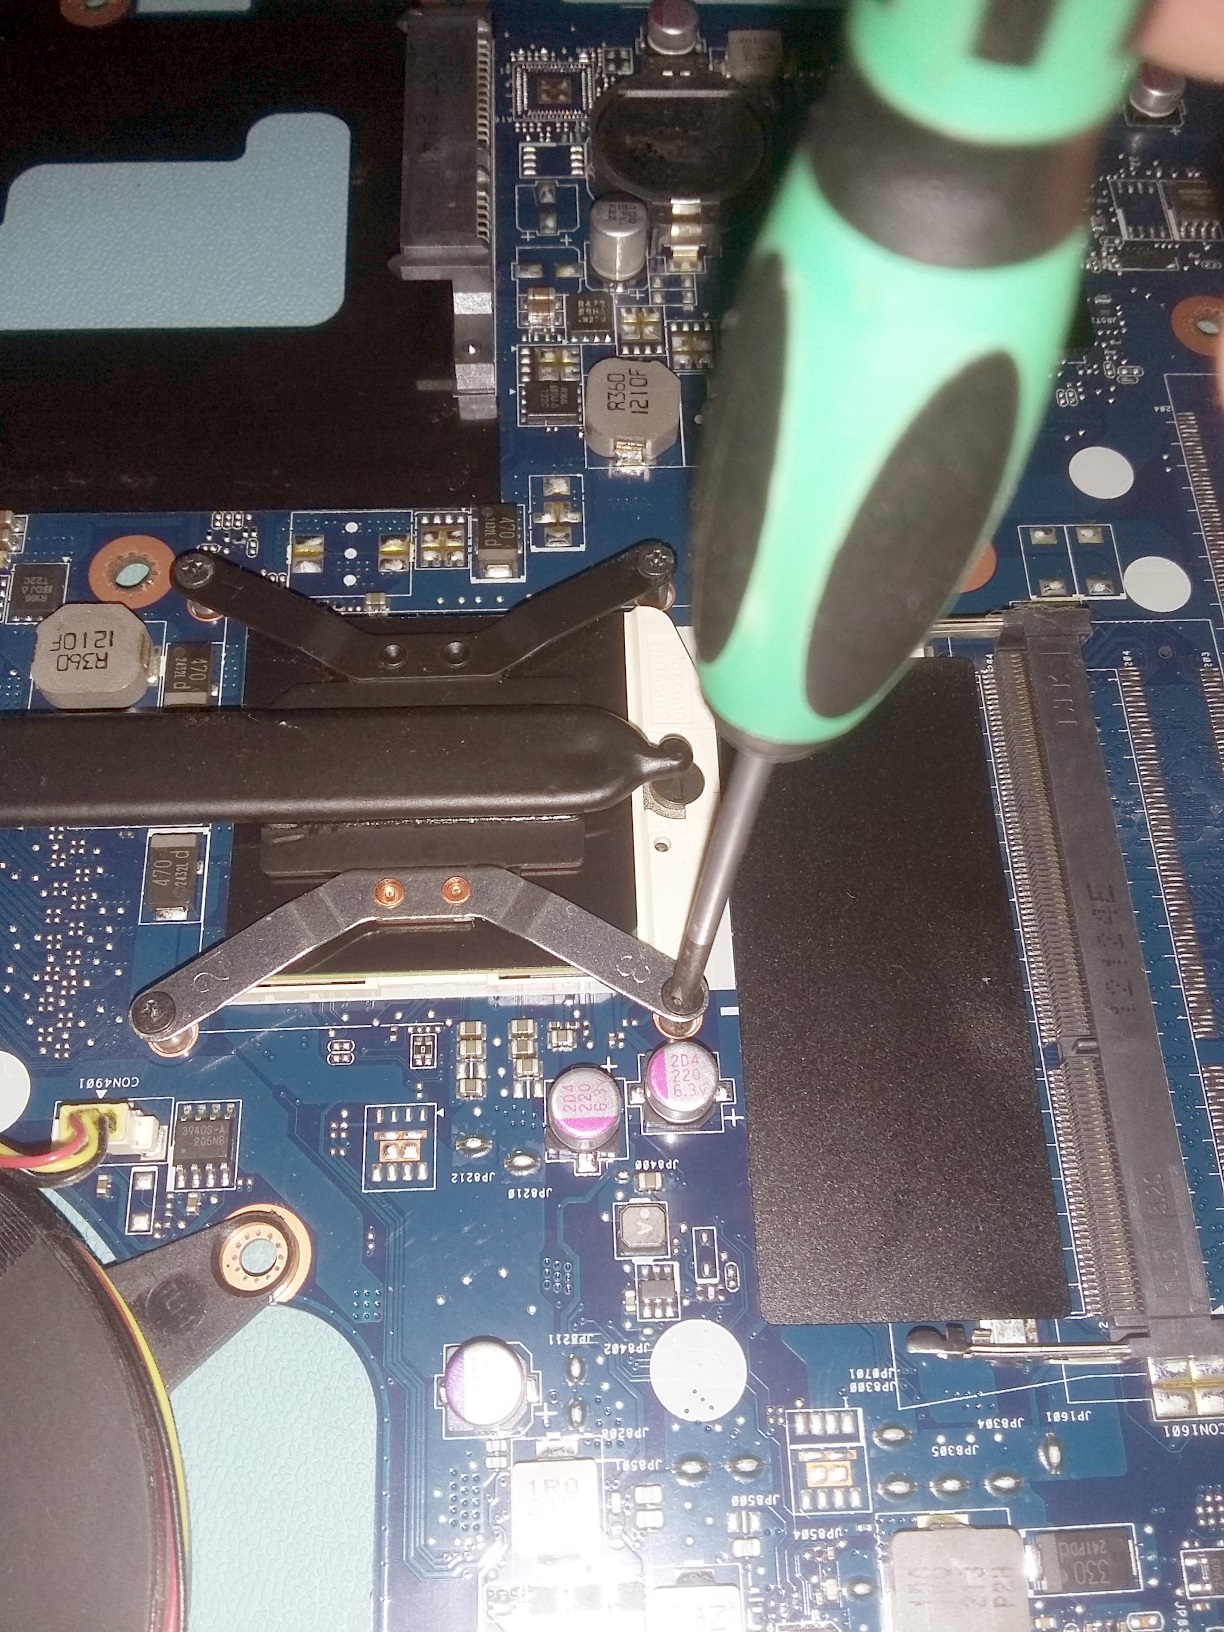
Screw the CPU heat sink back on
From this point on, it was pretty easygoing. I made sure to drop the heatsink back on square, so as not to disturb the thermal goo too much, then tightened the screws in the marked order 1-2-3-4.
Reassembly complete: Testing
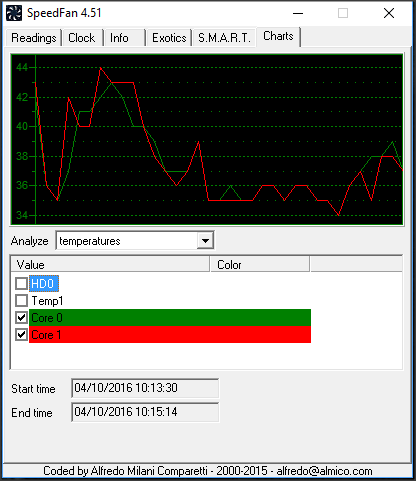
I forgot to take a screenshot of the temperatures the CPU was getting to during light usage, but let’s say 60 Degrees Celsius is far too hot. After reassembling the laptop, in pretty much the reverse order as above, I was rewarded with much lower core temperatures. Shown is at approx 50% CPU load, during light web browsing. Consequently, the cooling fan was operating at a very low speed and was almost inaudible. No more scorched thighs for me.
Final Thoughts
It’s funny how things catch up with you, isn’t it? It wasn’t even a whole month before the keyboard started to fail! I’m pretty hard on keys, and having hammered away without a care for the last few years, groups began not to register presses. This resulted in some strange comments from friends until I realised what was happening.
Had I the forethought (or had it started failing slightly earlier), I would have replaced the keyboard assembly while inside the laptop. Sadly, less than a month later, it was in pieces again to replace the keyboard. It’s quite an easy fix, and not expensive to buy via eBay. Still, you live and learn, don’t you? If someone reading this is attempting the same, it might be worth your time popping a new keyboard while you have the case open, right?
Just a thought.