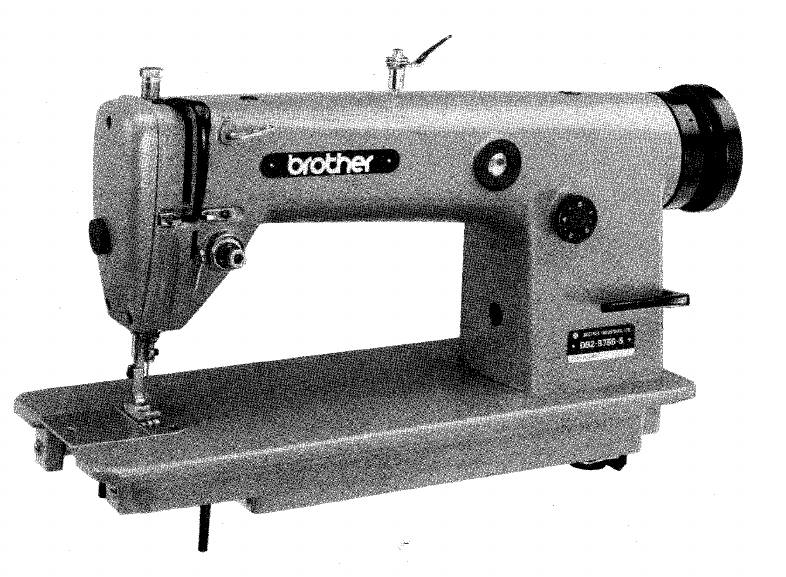
This sewing machine is quite old, probably around fifty years old. It is made of steel and has all-metal internals, making it perfect for handling tougher nylon materials I need to sew. I purchased it from someone who previously used it to make boat sails, specifically for the ABSS project. After changing the oil and reassembling it onto its stand, the machine was ready to use immediately.
Industrial machines usually operate similarly. They are placed in an oil bath that is fixed to a table. A small pump is responsible for distributing a thin machine oil to all the necessary places, ensuring that the machine does not wear out easily. The machine is externally driven through a pulley at the back, with a large “Cansew” clutch motor constantly spinning. When the foot pedal is pressed, a manual clutch engages to transfer power from the motor to the machine via a rubber V-belt. This clutch is designed to slip, allowing for speed control. This mechanism is essential, as these industrial machines can be very fast, much faster than a typical consumer-grade machine.
The DB2-B755 is not suitable for thick materials as it requires a walking foot unit. However, it is appropriate for airbags, hopefully.
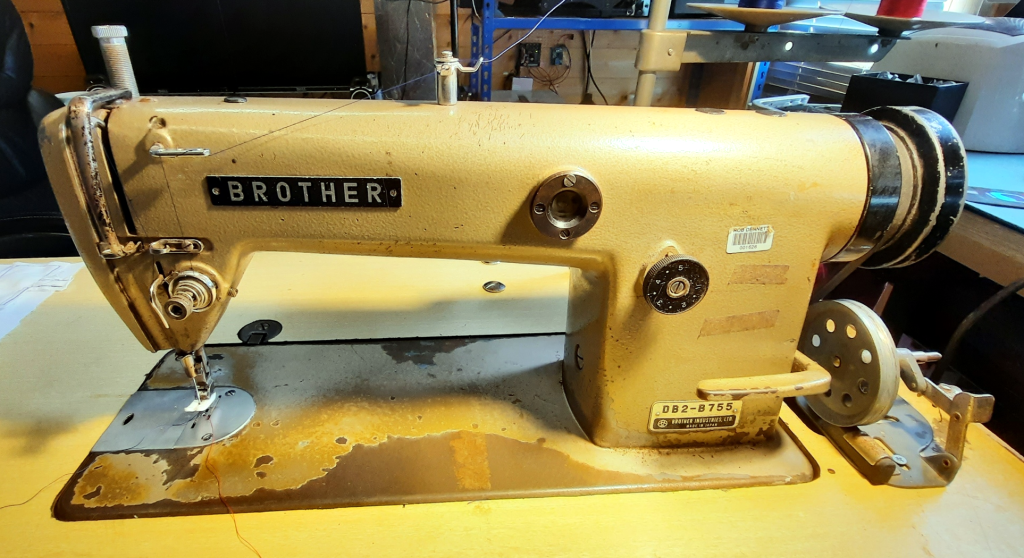
The image above shows the machine positioned on its table, with the bobbin loader and some inexpensive test thread. The threading pathway is specific to this machine and is crucial to get right if you want to sew a line of stitches that will last more than a few seconds. There are several tensioners around the machine that keep the thread slightly taut when needed, allowing the machine to operate without getting tangled in knots.
It is important to grasp how these machines work. There are two separate threads involved. The upper thread path is the only one that is visible. It releases the upper thread from the spool vertically to prevent snags. While not depicted in the image, this is accomplished using a simple vertical pole with a horizontal metal arm. The arm has a small plastic-lined hole through which the thread is fed. After being pulled up, the thread is passed down to the machine from above and through the tensioner on the top. The thread is tight on the left and loose on the right, as shown. I will provide further explanation of the threading route later on the page.
Winding the Bobbin
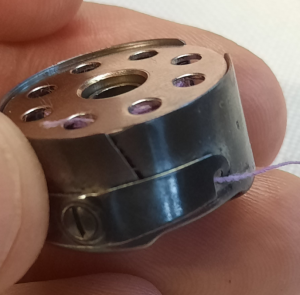
The bobbin can be seen inserted into the holder. These bobbins are standard for non-walking foot machines, and walking-foot machine bobbins are larger. To load a bobbin, insert it into the holder with a protruding length, pass the thread through the angled slot around the back of the tensioner arm, and hook it underneath. It’s important to note that the bobbin should be inserted so that pulling the thread by hand will rotate it anti-clockwise when viewed from above, as this machine runs anti-clockwise.
The small slotted screw in the bottom of the image is used to adjust the lower thread tension, which may be important later on.
The bobbin holder is installed in the machine from below. It moves only in one direction with a click. To remove it, flip up the lever on the front.
The DB-2 has a bobbin winder mechanism to wind the thread onto the bobbin in tension for clean de-spooling.
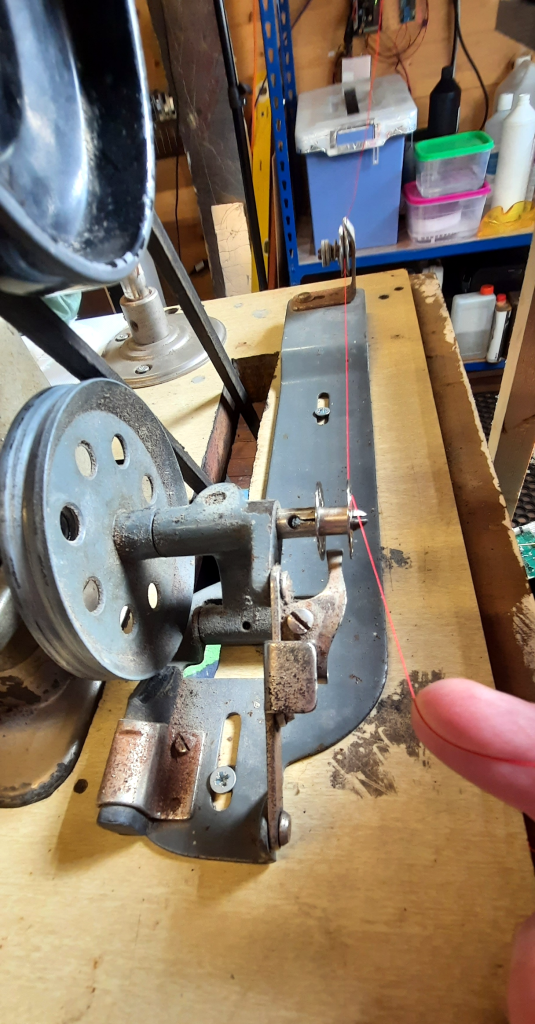
The spool holder on the sewing machine can hold two large reels, but I currently have only small test ones installed. One reel is for the top thread, and the other is for the bobbin winder. Using a single reel is not recommended because if the lower thread runs out, you must pull out the top thread and re-thread it after winding the bobbin. This can be time-consuming, especially in an industrial setting. It’s best to use two reels for your machine. You can use different colours to identify which thread is causing a problem and adjust the tensioners accordingly.
To wind the bobbin, first, push it onto the brass holder attached to the drive wheel. Then, take the thread from the reel and pass it through the hole in the tensioner arm, which is designed to guide the loose thread into the tensioner disks. Pull the thread under and through the disks. There are two metal disks pushed together by an adjustable spring, allowing you to adjust the tension on the bobbin. Next, pass the thread through one of the holes in the bobbin and hold it in place by hand.
At the bottom of the tensioner unit, there is a small lever. When you push this lever, it engages the bobbin winder wheel onto the outside of the drive belt. This allows you to wind the thread onto the bobbin neatly and securely. Keep an eye out for a small lever at the bottom that disengages the drive wheel when the bobbin is almost full. Pay close attention during this process to avoid overfilling the bobbin. If the bobbin is overfilled, it won’t fit in the holder, wasting time and thread.
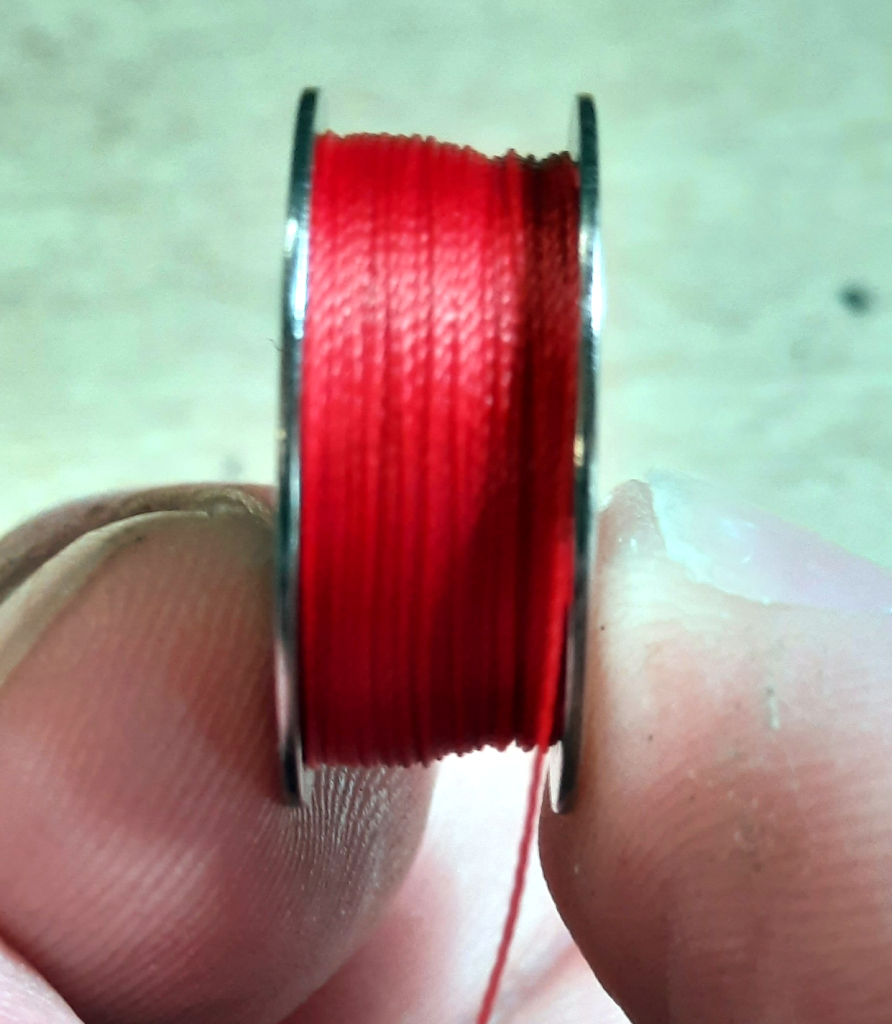
The uneven winding won’t be a significant issue for a quick test, but the bias towards the left reduces the amount of thread that can fit on the bobbin, making it necessary to reload more frequently. This is caused by the tensioner assembly not being centred with respect to the bobbin. However, you can easily recenter it by loosening the mounting screw on the tensioner.
Another option is that the bobbin wasn’t pushed far enough onto the winder.
Upper Threading Path
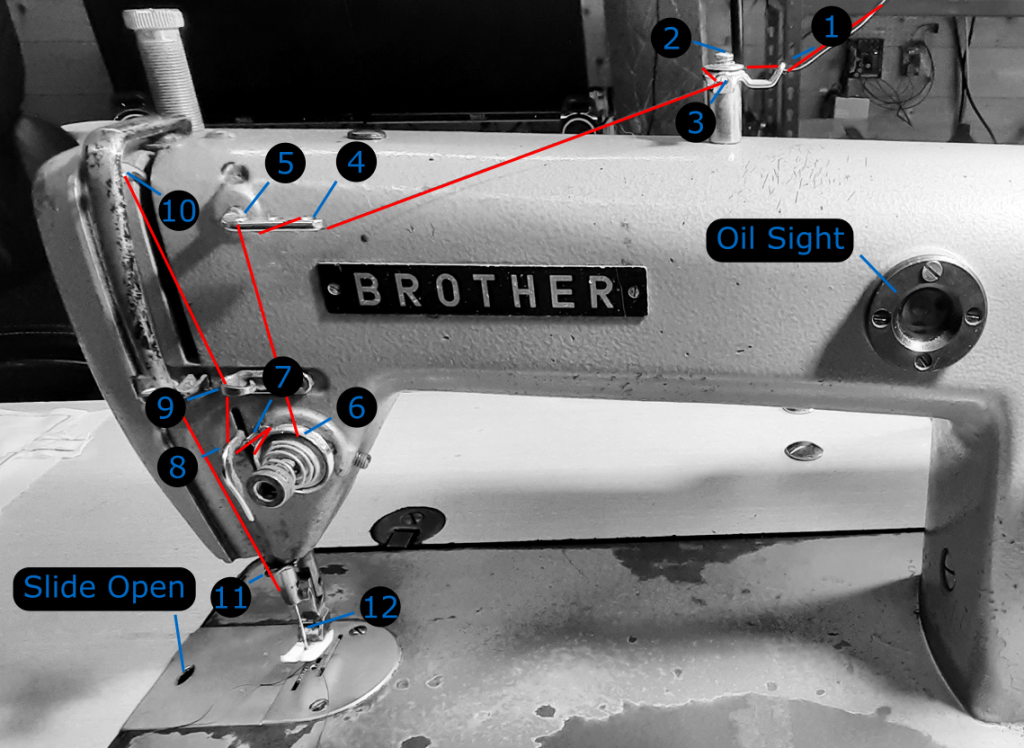
As mentioned earlier, the upper thread path is quite critical, else the machine will knot the thread or snap it. The recommended path is as follows:
- Top tensioner arm, first hole: Pass the thread from right to left to guide it towards the tensioner disks.
- Top tensioner disks: Pass the thread around the back of the machine in between the disks
- Top tensioner arm, second hole: Take the thread out of the disks and through the other hole
- Middle tensioner arm, first hole: The thread needs to pass through from below
- Middle tensioner arm, third hole: The thread is wrapped over the top of the arm to pass through the third hole from below
- Main tensioner: Pass the thread around the tensioner, between the disks from above from about 11 pm anticlockwise back to about 10 pm position
- Main tensioner spring clip: There is a small clip. Pass the thread behind it so that when the thread is pulled taught, the clip rotates freely, but the thread travels with it
- Lower arm: Pass the thread under from right to left and upwards towards the takeup lever
- Upper guide clip: Push the thread towards the body of the machine to snap it behind the clip
- Takeup arm: Take the thread from right to left
- Lower guide clip: Pass the thread behind on the way down to the needle
- Needle: Thread through the needle from right to left, then pass the thread down through the foot and off to one side
Machine Needle
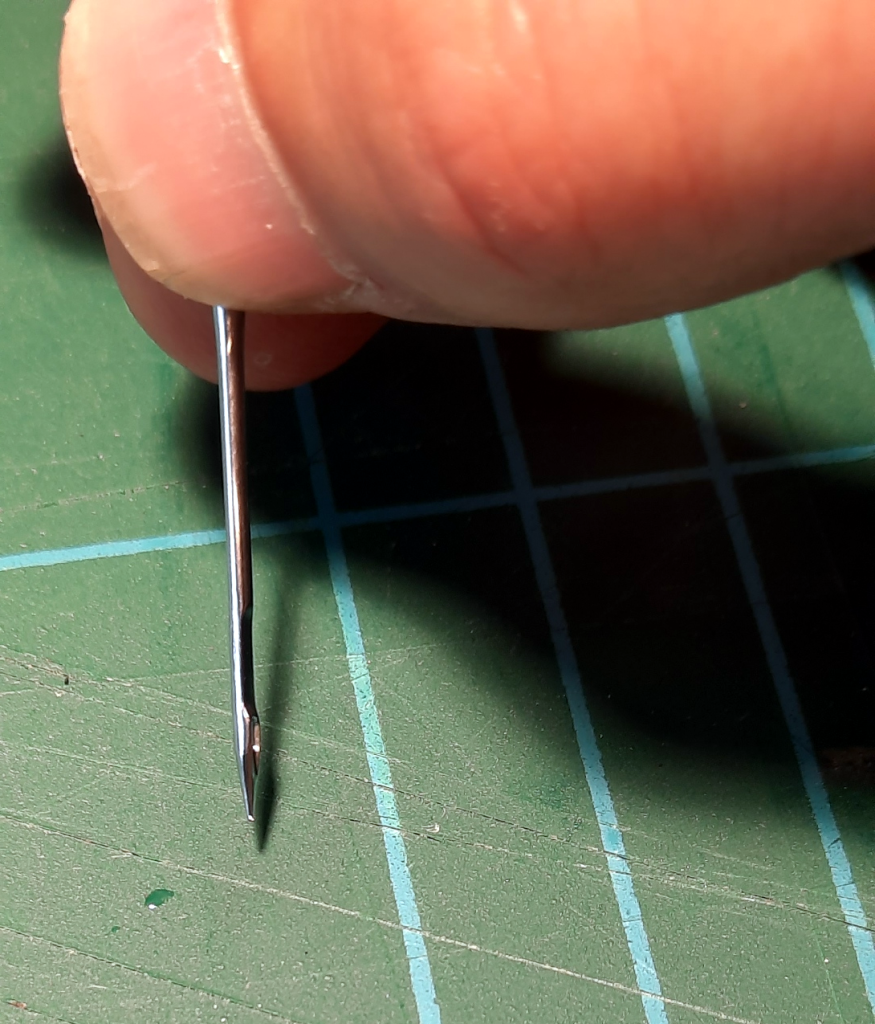
Machine needles have a groove on the side. For this machine, the groove needs to be on the right-hand side, facing the machine.
Adjustments
Here are just a few of the areas to look into to fully understand this machine enough to make adequate use of it. All in good time!
- material pressure adjuster
- foot height adjuster
- feed dog adjuster
- stitch length adjuster
- top thread tensioner
