
I like PartKeepr. I use it every day. However, it is not exactly trivial to install, and development has slowed to a crawl, so it no longer works with a completely up-to-date software stack.
Nonetheless, it can still be made to work and is still very useful.
So what is it?
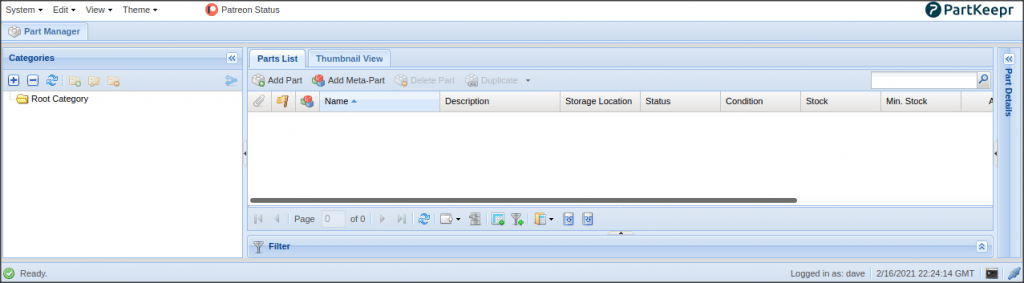
Partkeepr is an inventory management system particularly geared towards electronics and engineering parts. It runs as a web service, providing a pretty easy-to-use user interface to a database containing your data. PartKeepr allows you to define storage locations and zones, as well as a hierarchical category for the part.
PartKeepr also maintains an easily accessible datastore for datasheets, images, and other useful files associated with the part, which doubles as a handy document control for your reference.
Octopart
Partkeepr integrates with Octopart.com, which gives you immediate access to part costs, suppliers, descriptions, and datasheets. All from a part number. You can even type in the RS components stock code, and Partkeepr and Octopart will do all the work for you.
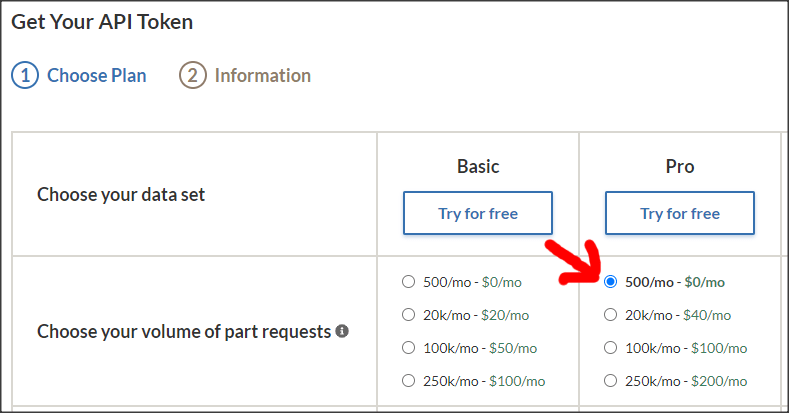
There is a catch, though. The Octopart service used to offer unlimited free access to their API to enable this integration magic, but then they removed this free option. Recently, they reintroduced a free tier, which currently restricts you to 500 parts per month. That should be fine for most small-time operators like me. A credit card is required to access even the free tier, but they promise not to charge it until you upgrade to a paid tier. The free ‘pro’ dataset is the one you should select.
Installation
I’ve installed Partkeepr a few times on various versions of Ubuntu. The dependencies haven’t really changed, but the OS has, making those dependencies harder to find. Unfortunately, Stock Ubuntu 20.04 isn’t going to work out of the box.
Partkeepr runs on PHP 7 but needs a slightly older version than the one that ships with Ubuntu. Only that causes installation issues. The rest is all stock.
The issue is that PartKeepr is written using the Symfony2 framework, and the version is old, so it is only compatible with PHP 7.0 or PHP 7.1
Ubuntu 20.04 ships with PHP 7.4, which upgrades Symfony and breaks PartKeepr. This issue will go away when someone has time to migrate to a newer version.
Staging
Firstly, I would suggest making a test installation with a fresh Ubuntu install, to dry-run all the steps before you apply them to your server hardware. That way, if something you do is going to have side effects and break something, at least you know what you did and can back it out.
I downloaded the latest Ubuntu 20.04.2.0 AMD64 ISO image and fired up a fresh VirtualBox machine. If you prefer, there is also an Ubuntu server image on the same site.
LAMP
Firstly, you need to set up a LAMP stack. If you really have to use Nginx (LEMP), then just set up as appropriate and ignore the Apache parts.
The ‘L’ part is easy – we already have Ubuntu Linux.
The ‘A’ part is for Apache2. Let’s apply that:
$ sudo apt update
$ sudo apt -y install apache2
Next, you need to let HTTP into the firewall (if installed)
$ sudo ufw app listYou should see a bunch of Apache2 applications. Let’s let the HTTP access in and check it worked:
$ sudo ufw allow 'Apache Full'
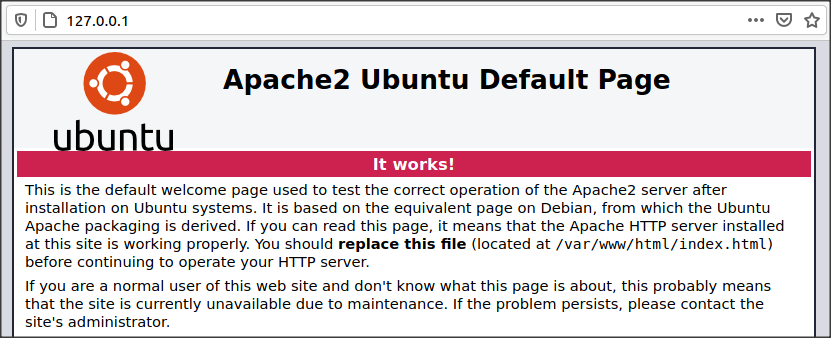
$ sudo ufw statusFor a quick test, we should be able to see Apache2 serving its default welcome page to the local loopback address. Open a browser and send it to http://127.0.0.1. This will obviously only work if you are operating on a local machine. You can safely skip this step in that case.
We need to set up Apache2 to allow it to serve from the network side.
Firstly, let’s enable mod_rewrite and restart Apache:
$ sudo a2enmod rewrite
$ sudo systemctl restart apache2
If you don’t have it to hand, we need the machine’s IP address in question (yes, I am ignoring machines with multiple interfaces). If this address has a domain attached to it, you can use that instead.
$ ip addressNext, backup the default Apache config, and make a new file with this content:
$ cd /etc/apache2/sites-available
$ sudo cp 000-default.conf 000-default.conf.bak
$ sudo nano 000-default.conf
<VirtualHost *:80>
ServerName your-ip-address -or- domain
DocumentRoot /var/www/html/partkeepr/web/
AcceptPathInfo on
ErrorDocument 403 "<h1>Update in progress. Check later.</h1>"
<Directory /var/www/html/partkeepr/web/>
Require all granted
AllowOverride All
</Directory>
## Logging
ErrorLog "/var/log/apache2/partkeepr_error.log"
ServerSignature Off
CustomLog "/var/log/apache2/partkeepr_access.log" combined
</VirtualHost>
Restart Apache:
$ sudo systemctl restart apache2We’ll come back and test it once the other bits are installed.
Now, we move on to the ‘M’ part. ‘M’ is for ‘MySQL.’
Install and secure it, and set the MySQL root password:
$ sudo apt -y install mysql-server
$ sudo mysql_secure_installation
We need to adjust the MySQL authentication method:
Open up /etc/mysql/my.cnf and insert the following section:
[mysqld] default-authentication-plugin=mysql_native_passwordNow would be a good time to restart MySQL and check for any errors:
$ sudo systemctl restart mysql.service
$ sudo systemctl status mysql.service
The last bit is ‘P’ for PHP. This is the bit that differs from stock Ubuntu 20.04. We need to configure an older PHP repository to provide the specific version we need. We’re going to aim for PHP 7.2.
Handily Ondřej Surý has provided a backports PPA repository we can make use of for just this situation:
$ sudo add-apt-repository -y ppa:ondrej/php
$ sudo apt update
Let’s install the bulk of the PHP components we need
$ sudo apt install php7.2 php7.2-apcu php7.2-apcu-bc php7.2-curl php7.2-gd php7.2-intl php7.2-ldap php7.2-mysql php7.2-xml php7.2-zipWe’ll need to configure the PHP timezone before anything will work. Open up the config file and locate the [Date] section to make the changes:
$ sudo nano /etc/php/7.2/apache2/php.ini[Date]
; Defines the default timezone used by the date functions
; http://php.net/date.timezone
date.timezone = Europe/London
You need to check the official PHP timezone list to ensure it matches your location.
That’s the LAMP stack setup we need done, now to actually download PartKeepr and configure it:
Grab a zip or bzip archive from the download page. You can clone the GitHub repo if you want, but there are a couple of extra steps you need to take, which are detailed in the Partkeepr setup guide. We’ll download, uncompress, and move it somewhere the web server can find it.
$ wget https://downloads.partkeepr.org/partkeepr-1.4.0.zip
$ sudo cp partkeepr-1.4.0.zip /var/www
$ cd /var/www
$ sudo unzip partkeepr-1.4.0.zip
$ sudo mv partkeepr-1.4.0 html/partkeepr
Then we fix up the ownership and permissions:
$ cd /var/www/html
$ sudo chown -R www-data:www-data partkeepr
$ sudo find partkeepr -type d -name "*" -exec chmod 775 "{}" ;
$ sudo find partkeepr -type f -name "*" -exec chmod 664 "{}" ;
We need to hack the code a little to circumvent a weird monolog issue in Symfony. This code change seems safe and gets the job done.
$ sudo nano /var/www/html/partkeepr/vendor/symfony/monolog-bundle/DependencyInjection/Configuration.phpLook in the function getConfigTreeBuilder() around line 594. Comment out the line of code shown and add the one below, so it looks like this:
->validate()
//->ifTrue(function ($v) { return ('fingers_crossed' === $v['type'] || 'buffer' === $v['type'] || 'filter' === $v['type']) && 1 !== count($v['handler']); })
->ifTrue(function ($v) { return ('fingers_crossed' === $v['type'] || 'buffer' === $v['type'] || 'filter' === $v['type']) && (empty($v['handler']) || !is_string($v['handler'])); })
->thenInvalid('The handler has to be specified to use a FingersCrossedHandler or BufferHandler or FilterHandler')
->end()
During configuration, you may get a warning about PHP execution time, if you are on older hardware or there is considerable load, this is an error you will see often. And it’s annoying. There is a quick tweak to the PHP config file:

In /etc/php/7.2/apache2/php.ini:
;;;;;;;;;;;;;;;;;;;
; Resource Limits ;
;;;;;;;;;;;;;;;;;;;

; Maximum execution time of each script, in seconds
; http://php.net/max-execution-time
; Note: This directive is hardcoded to 0 for the CLI SAPI
max_execution_time = 300
Restart Apache, then you can point your web browser at:
http://<your-ip-or-domain>/setup and you should see:
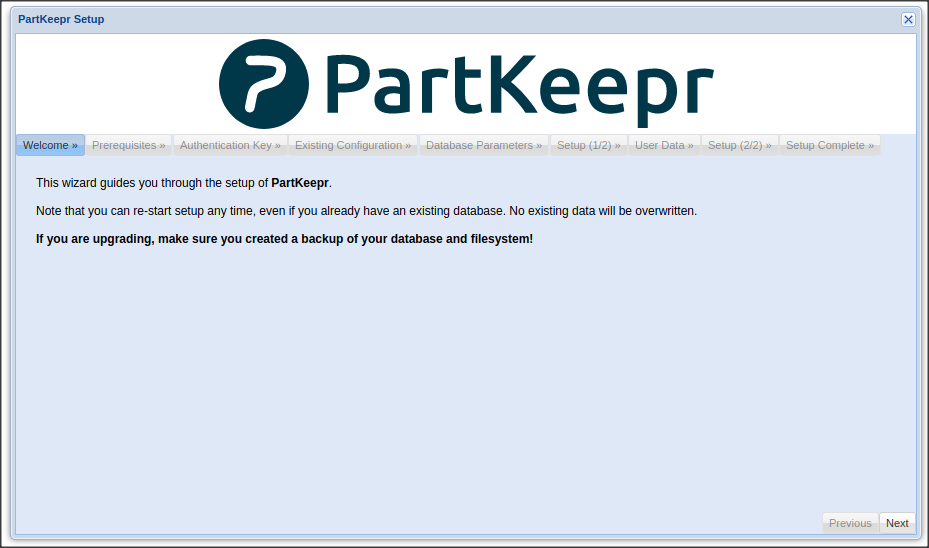
You can hit ‘next’ and start the checks & setup process. If you see errors, then you will need to check the previous steps, but first, try restarting Apache to be sure.
PartKeepr Config
On the next setup page, it will prompt for the authentication key. Grab it from here, and paste it into the window:
$ cat /var/www/html/partkeepr/app/authkey.phpClick ‘next’ a few times until we reach the database setup page. You will want to select ‘MySQL’ and check ‘show commands to create database.’
We will enter a few details and then go to the command line to create the database to match them. Helpfully, PartKeepr will give us a set of commands to use that won’t work anymore, but the changes aren’t too extensive.
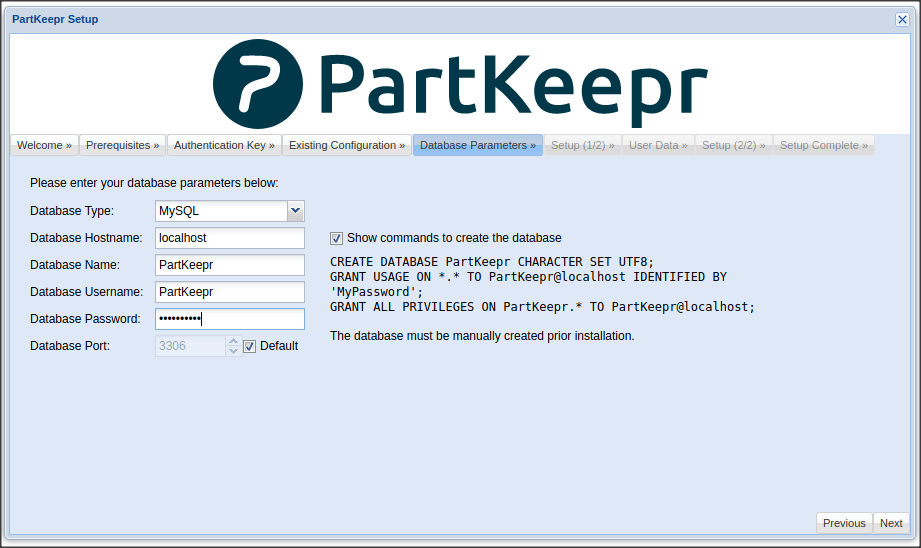
We need to manually create and configure a database for PartKeepr:
$ sudo mysql -u rootmysql> create database PartKeepr character set utf8;
mysql> create user 'partKeepr'@'localhost' identified with mysql_native_password by '<my password>';
mysql> grant all privileges on PartKeepr.* to 'partKeepr'@'localhost';As soon as you quit, you can hit the ‘next’ button in the setup to test the database connection and create the PartKeepr database contents.
Hit ‘next’ and set up your first user account.
On the final setup page (2 of 2), if you see a failure in the ‘warming up the cache’ section, you need to go back and check that you edited the PHP source file Configuration.php correctly.
Final Steps
PartKeepr needs some cron set-up to operate correctly:
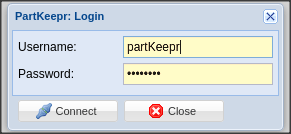
$ sudo nano /etc/cron.d/partkeepr0 0,6,12,18 * www-data /usr/bin/php /var/www/html/partkeepr/app/console partkeepr:cron:runOnce you leave the last page, you should automatically be directed to the login prompt. This is the user/password you configured a few steps back. It is not the MySQL user.
Any additional users you need are configured in the ‘users’ menu item under ‘edit.’
Octopart
We have a problem
The instructions in this section are relevant and correct, but at the time of testing, it is unclear if the API is actually going to work with this version of PartKeepr. We need v3 API access, but it is possible that new API keys will only work with v4 API, which PartKeepr does not currently support. Oh well. I’ll post an update if I get anywhere with it.
Let’s not get carried away with adding storage locations, part categories, and data just yet—there is the killer feature to enable—Octopart integration.
Now that we’ve completed all the other config, we can obtain the API key, place it in the config file, and rerun the setup to complete it.
Go to octopart.com and register for an account. Then, go to the API selection page to select the free tier professional option.
Go open up /var/www/html/partkeepr/app/config/parameters.php and add the key to the variable partkeepr.octopart.apikey
You then need to re-run the setup page, as earlier, and accept all its contents.
I had a strange problem with the ‘warming up the cache’ item, which I resolved by manually deleting /var/www/html/partkeepr/app/cache/prod.
That should be all there is to it. If needed, help can be found on the PartKeepr Users Google group, which is still quite active.
